Gaia Gensouki (Illusion of Gaia) — No Experience Points, No Shops, No Way Back: Quintet's Relentless World Tour
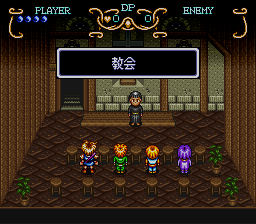
Most action RPGs let you grind, shop and backtrack until you feel ready. Gaia Gensouki — released overseas as Illusion of Gaia in North America and Illusion of Time in Europe — does none of that. There are no experience points, no currency, no equipment and, for most of the journey, no returning to places you have left. You grow stronger only by clearing every enemy out of every room, you heal from a tiny stock of herbs and at glowing Dark Spaces, and the road runs one way: from a sleepy port town past the Inca ruins, the Nazca lines, the sunken continent of Mu, the Great Wall of China and Angkor Wat to the Tower of Babel and a comet that is not what it seems.
This guide covers the original Japanese Super Famicom version of 1993 in depth: its room-clear growth system, its three playable forms, its dungeons, and the 50 Red Jewels — the game's one great side quest — all the way to the hidden mansion and the boss inside it. Where overseas versions changed names, text or even a boss's appearance, that is flagged as an overseas change.
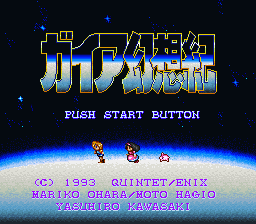
Quick Facts
| Item | Detail |
|---|---|
| Original title | Gaia Gensouki (ガイア幻想紀) |
| Overseas titles | Illusion of Gaia (North America); Illusion of Time (PAL) |
| Platform | Super Famicom / SNES |
| Release (Japan) | November 27, 1993 |
| Release (North America) | September 26, 1994, as Illusion of Gaia |
| Developer | Quintet |
| Publisher | Enix (Japan); Nintendo (North America / PAL) |
| Director | Masaya Hashimoto |
| Character design | Moto Hagio |
| Story | Mariko Ohara |
| Music | Yasuhiro Kawasaki |
| Genre | Action RPG |
| Cartridge | 16 Mbit, HiROM FastROM, ROM + RAM + battery (SRAM save) |
| Playable forms | Tem (Will overseas), Freedan, Shadow |
| Structure | A one-way journey through real-world-inspired ruins; six Mystic Statues to collect |
| Series position | Middle work of the unofficial Quintet trilogy, between Soul Blazer (1992) and Terranigma / Tenchi Souzou (1995) |
A note on the publisher line, because older summaries often garble it: the Japanese original was an Enix release. Nintendo published the game overseas. The hero's name differs in the same way — he is Tem in Japan and Will in the overseas versions.
Overview
The setting is an Earth that resembles the age of exploration, reimagined: real places and legends — Machu Picchu, the Nazca lines, Mu, the Great Wall, Angkor Wat, the Egyptian pyramids — strung along a single route. Tem is a boy with psychokinetic gifts who survived the expedition to the Tower of Babel that claimed his father. When a runaway princess, a royal letter and a mysterious being named Gaia pull him out of South Cape, he learns that a comet is approaching and that its influence is warping the world. His task is to gather the six Mystic Statues scattered through the ruins of old civilisations before the comet arrives.
Moment to moment, this is top-down, real-time action viewed from above. Tem fights with his flute; his two other forms, met in Dark Spaces, fight with a sword and with an energy body. There is no party, no menu of spells and almost no inventory management: a short item list, one healing item (the Herb), and a set of techniques learned one by one — Psycho Dash, Psycho Slider, Spin Dash for Tem; Dark Friar, Aura Barrier and Earthquaker for Freedan; and, very late, Shadow's Aura, which lets him melt through certain floors.
The engine underneath is the game's signature. Enemies occupy rooms in fixed numbers; clear every enemy in a room and a jewel appears that permanently raises one statistic — life, attack or defence. Miss a room and that increase is gone from your final build, because most areas cannot be revisited. Add the 50 Red Jewels, hidden in chests, pots, conversations and mini-game prizes and traded to a wandering jeweller, and the completionist layer becomes simply playing thoroughly, once, in order.
Why It Still Matters
Gaia Gensouki is the middle panel of the loose trilogy Quintet built with Enix — Soul Blazer before it, Terranigma after — sharing themes of a wounded world, reincarnation and gods who may not deserve obedience. Of the three, it is the most linear and the most openly melancholy: its ruins are real places where real civilisations ended, and the script keeps asking what progress costs, from diamond mines worked by forced labour to a floating city gambling on human lives. Those darker passages are also where the overseas versions intervened most — the Japanese text is the reference here.
It also remains a design outlier: the room-clear system turns exploration itself into levelling and makes "did I miss a room?" the game's central anxiety. And unlike its younger sibling, it did reach North America at the time — for many overseas players this, not Terranigma, was the Quintet game they grew up with, which is why its absence from modern catalogues (see How to Play It Today) stings.
Highlights
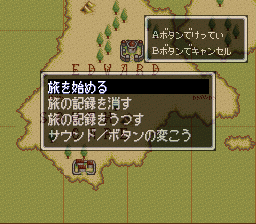
Growth by clearing rooms, not by grinding. No XP, no levels, no respawn farming: defeat every enemy in a room once and take the permanent stat jewel. Thoroughness is the build.
Three forms, one hero. Tem solves and slips through gaps; Freedan out-ranges and out-damages him; Shadow, arriving only in the Pyramid, out-damages both and melts through floors. The Dark Space statue you stand before decides which toolkit the next stretch uses.
A real-world atlas as a dungeon list. Inca stonework, a garden over the Nazca lines whose underside is a second map, sunken Mu, the Great Wall as a multi-level climb, Angkor Wat, and a pyramid of six trial rooms — the variety is geographical, not just cosmetic.
The 50 Red Jewels. A whole-game treasure hunt with permanent rewards, a fail state you cannot repair (missed jewels in one-way areas stay missed), and a genuinely hidden final reward that ties the game back to Soul Blazer.
Strategy Essentials
First, the growth system: read this before anything else
There are no experience points. When you defeat all enemies in a room or defined area, a jewel appears; taking it permanently raises one of three statistics — maximum HP (life), attack strength, or defence. Three rules follow:
- Partial clears pay nothing. One surviving enemy means no jewel. Use the on-screen enemy indications and sweep corners before leaving a room.
- Re-clearing pays nothing twice. Enemies may reappear if you leave and return, but the bonus is awarded once only.
- Most of the map is one-way. Until late in the game, story travel closes areas behind you. A missed room is usually a permanently smaller stat total — the same is true of Red Jewels in those areas.
Defeated enemies drop small orbs; collecting 100 earns an extra continue-style life, so orbs are worth gathering even in cleared rooms. Bosses are one-time encounters — guides consistently list the main guardians at 40 HP each, the comet's first form at 20 HP — with no way to revisit them for practice.
The Red Jewels and Gem the jeweller
There are 50 Red Jewels in total. They sit in chests and pots, are handed over by NPCs (sometimes for errands, sometimes for catching someone out), hide in a gambling mini-game, and — in the Diamond Mine — arrive three at a time from a rescued worker. To bank one, select it in the item menu and use it: it is sent straight to Gem, the jeweller, who appears in town after town in different guises. Talk to Gem in person to collect the cumulative rewards:
| Jewels sent (cumulative) | Reward (Japanese name) | Effect |
|---|---|---|
| 3 | Herb (薬草) | The game's only healing item; restores HP fully when used. Stock them — see below. |
| 5 | Defense Force (守りのフォース) | Defence +1, permanently. |
| 8 | Life Force (命のフォース) | Maximum HP +1, permanently. |
| 12 | Strength Force (力のフォース) | Attack +1, permanently. |
| 20 | Psycho Power (サイコパワー) | Strengthens Tem's Psycho Dash attack. |
| 30 | Dark Power | Strengthens Freedan's Dark Friar so the projectile can be split into four in flight. A backup route to a similar boost exists much later in Euro if you miss the pace — guides describe the Euro drink as a failsafe, not a second stacking bonus. |
| 50 | "My secret" — Gem's Mansion | Gem takes you to a hidden stage: a mansion full of powered-up mine enemies, one Herb in a chest, and the secret boss Solid Arm, carried over from Soul Blazer. Heal and save before you accept — and note the mansion's rooms give no stat jewels. |
Practical pacing: send jewels as you find them (it also frees inventory space); the early thresholds pass naturally, since South Cape and Edward Castle alone hold several. The dangerous ones are the one-time jewels in one-way dungeons — guides single out Sky Garden, Mu, the Diamond Mine, the Great Wall and Angkor Wat — plus the mine's hidden batch of three (find the wall where Tem's hair blows in the wind; Psycho Dash through it) and the two won from Dao's Snake Panic game. The 50th waits on the Tower of Babel altar where Tem's flute story began; collect it before the final sequence, then visit Gem.
A caution on numbers: the thresholds above (3 / 5 / 8 / 12 / 20 / 30 / 50) are where Japanese and overseas guides agree, and both language versions of this article use them. Some secondary summaries rename individual rewards — particularly the 20- and 30-jewel technique upgrades — so names here follow the Japanese version's own items.
Dungeons and bosses, in order
Boss names below are the Japanese version's, as used by Japanese-version guides; the better-known overseas names are noted where they differ — in the overseas versions the Inca guardian is called Castoth, the Sky Garden guardian Viper, and the Pyramid guardian Mummy Queen. The Sky Garden boss also looks different overseas (a winged Babylonian-style statue, where the Japanese version's is a giant bird) — an overseas change, not a Japanese-version detail.
| # | Dungeon / area | Boss | Where players get stuck — approach, not answers |
|---|---|---|---|
| 1 | Larai Cliff & Incan Ruins (model: Machu Picchu) | Lava Body | Learn the room-clear habit here. Statues are moved with L/R telekinesis, not pushed; the diamond block belongs in the diamond hole. For the boss, deal with the hands first, then strike the head in its lit window, using Freedan's reach. |
| 2 | Diamond Mine (via Freejia) | — (no guardian) | A rescue errand, not a boss dungeon. Its missable heart is the wind-blown wall (above) worth 3 Red Jewels. |
| 3 | Sky Garden (above the Nazca lines) | High Wind | A two-sided map: switches on the underside rewrite the top side. Work quadrant by quadrant and set all four Crystal Balls. Its Red Jewels are one-time: sweep before you jump down for good. |
| 4 | Seaside Palace & Mu | The Vampire pair (40 HP each) | Water-level puzzles driven by Prayer/Rama statues; Psycho Slider, learned here, opens the low passages. The pair is the game's first wall: fight as Freedan, focus one vampire, never stand where their attacks cross, and budget Herbs for this fight. Afterwards, deal with the bomb event rather than walking away. |
| 5 | Angel Village & its dungeon | — (story dungeon) | Painting-and-statue puzzles and a rescue, not a guardian. Search pots and side rooms for Red Jewels before the story moves you on. |
| 6 | Great Wall of China (via Watermia) | Sand Fanger | A vertical dungeon: falling through holes is progress, not failure. Spin Dash, learned here, climbs the ramps. The boss can only be hurt on the head as it surfaces — one hit per pass, patience over greed; clear its spawned young quickly. |
| 7 | Mt. Kress / Mountain Temple & Angkor Wat | — | Learn Aura Barrier at Mt. Kress. In Angkor Wat, learn Earthquaker in the eastern Dark Space and use it to stun the rock enemy. The Black Glasses reveal the way through the temple’s second floor. |
| 8 | The Pyramid (via Dao) | Pharaoh (Mummy Queen in North America) | Six doors, six Hieroglyph tablets, a required toolkit rotation: some rooms are Tem's, some are Shadow's. Shadow and the Aura Ball are gained inside, in a Dark Space — melting through marked floors becomes both route and escape. Master Aura timing here; the Tower reuses it. Fight the boss as Freedan. Attack from the upper ledge, drop away when the spirits fan out, and use Dark Friar to counter. Earthquaker from a ledge is another option. |
| 9 | Tower of Babel | Five guardian rematches, then the comet and Dark Gaia | The tower brings back five groups of guardians, including the Pyramid boss. Prepare for stretches with no save or full heal. In the comet fight, aim for the open mouth and use Aura to dodge the wide barrage. |
The Pyramid boss is Pharaoh in the Japanese version and Mummy Queen in the North American version. The Tower of Babel brings back the guardians from earlier ruins, including the Pyramid.
Stat-raising items and where growth comes from, chapter by chapter
Apart from Gem's three Force rewards (in the Red Jewel table above), there are no stat items in chests. All other growth is the room-clear jewel system, organised here by stretch of the journey so you can see what thorough play in each chapter is worth. The Japanese names for the named items are given first; the room-clear jewels themselves are awarded automatically and are described by the stat they raise.
| Stretch of the journey | Named stat item available | Room-clear growth on offer | Notes |
|---|---|---|---|
| Opening: South Cape → Edward Castle → Itory | Defense Force (守りのフォース) at 5 jewels sent — claimable from Gem in the early towns | First life / attack / defence jewels, in the castle underground and on the road | Starting figures are tiny (guides record HP 8, attack 1, defence 0), so these first jewels are proportionally huge. Do not rush the castle escape. |
| Inca chapter: Larai Cliff → Incan Ruins → Gold Ship | Life Force (命のフォース) at 8 jewels; Strength Force (力のフォース) at 12 — typically claimed around Freejia after the voyage | A full spread of all three stats across the ruins' rooms | Every side room in the ruins is a stat. The Gold Ship is a story area — take its Mystic Statue from the hold chest. |
| Mine & garden chapter: Freejia → Diamond Mine → Sky Garden | Psycho Power (サイコパワー) at 20 jewels strengthens Psycho Dash | Continued all-three-stat growth; mine and garden are dense with rooms | Falling behind on Red Jewels starts to matter here: the 20-jewel upgrade is paced for players who found the mine's hidden three. |
| Mu chapter: Seaside Palace → Mu → Angel Village | — | Mu is one of the richest growth areas: room-by-room accounts record repeated attack, defence and HP jewels | Learn Psycho Slider in Mu's Dark Space and re-sweep rooms you could not fully reach — Mu lets you loop internally before the boss. |
| Wall chapter: Watermia → Great Wall → Euro | Dark Power at 30 jewels strengthens Dark Friar (four-way split) | HP jewels feature prominently on the Wall (including the glowing-eyed statue room) | Reaching 30 by around this chapter is the intended pace; if you are short, the later Euro failsafe exists because this threshold is missable in spirit. |
| Late chapter: Mt. Kress → Angkor Wat → Dao | — | Late jewels are scarcer and rooms tougher; Angkor Wat's clear rewards repay slow play | By now your build is mostly set. What remains is technique: Earthquaker control and, next, Shadow. |
| Endgame: Pyramid → Tower of Babel | — | Final room-clear jewels in the Pyramid's trial rooms (e.g. defence for clearing both Mystic Balls at the entrance) | Gem's Mansion gives no stat jewels — it is a challenge stage, not a growth opportunity. Finish growing before you go. |
The three forms and the Dark Space
Transformation happens only in a Dark Space — the glowing gateways found in towns and dungeons alike. Inside, Gaia heals you fully and saves your game; standing before the statues changes your form, and at certain Dark Spaces Gaia grants a new technique instead. There is no save or heal anywhere else except Herbs, which is why the route to the next Dark Space is the difficulty curve.
| Form | How / when unlocked | Signature techniques | Use them for |
|---|---|---|---|
| Tem (Will overseas) | From the start; the boy himself | Psycho Dash (charged lunge; breaks cracked walls/statues), Psycho Slider (running slide; low passages, learned in Mu), Spin Dash (charged spin up ramps, learned at the Great Wall); telekinesis with L/R | Puzzles, statue-moving, slopes and gaps only he can pass. The weakest attacker — swap out for combat when a Dark Space allows. |
| Freedan, the dark knight | First granted in a Dark Space in the Incan Ruins stretch | Sword with longer reach and higher attack than Tem; Dark Friar (charged projectile; four-way split after the 30-jewel upgrade), Aura Barrier, Earthquaker (sword planted from a height; freezes enemies) | Default dungeon combat form for most of the game; boss fights including the Vampires; switches beyond Tem's reach. |
| Shadow, the ultimate warrior | Gained in the Pyramid's Dark Space, together with the Aura Ball | Highest attack of the three; Aura (melt into liquid and sink through marked floors — also an evasion move); Firebird projectiles in the final battle | The entire endgame: Pyramid trial rooms, Babel rematches, the comet. Mastery is about Aura timing. |
Two habits make the system sing. First, plan form changes around Dark Spaces, not enemies: a room needing Tem's slide may sit behind a corridor built for Freedan's sword. Second, treat every Dark Space as a free full heal and save, and detour to one before any boss door.
Hidden and collectible elements
| Element | Total / nature | Role and the miss risk |
|---|---|---|
| Red Jewels (赤い宝石) | 50, hidden across the whole game | The one true side quest. Sent to Gem from the item menu; rewards and the hidden mansion are tabulated above. Highest miss risk in the game — many sit in one-way areas. |
| Mystic Statues (ミスティック像) | 6, main-quest items | The journey's spine: one per great ruin — the Gold Ship's hold (first), then Sky Garden, Mu (received from Rama before the Vampire fight), the Great Wall (after Sand Fanger), Angkor Wat, and the Pyramid. Not optional — the story gates on them. |
| Herbs (薬草) | Scarce; in chests, as the 3-jewel reward, and one in Gem's Mansion | The only healing item, with limited inventory space. Advice in both languages' guides is identical: hoard them for the Vampire pair and the Babel rematches, where no Dark Space intervenes. |
| Mystery Dolls and story key items | A handful, plot-bound | Items such as the Mystery Doll from the Gold Ship recur in the story; not collectibles to optimise, but open story chests in one-way areas before moving on. |
| Gem's Mansion & Solid Arm | Unlocked only at 50 Red Jewels | A hidden stage of powered-up Diamond Mine enemies, a single Herb as its material prize, and a boss imported from Soul Blazer. The reward is the fight and the revelation about Gem — go for the story, not the loot. |
| The Euro failsafe | One-time, late game | If the 30-jewel Dark Friar upgrade was missed on pace, a drink in Euro late in the game provides the same class of boost. Guides treat it as insurance, not a stacking bonus — do not plan around "both". |
One overseas-difference note, kept where it belongs: the overseas versions altered a number of text passages and some religious and darker references under the publisher's policies of the time, and renamed characters and bosses as noted above. None of that changes the systems in these tables; and where a detail in this guide could differ by version, the Japanese version has been treated as the reference throughout.
Who It's For
Play it if you like action RPGs with a strong authorial hand: a fixed route, a build earned by thoroughness, and a story that trusts melancholy more than exposition. It suits completionists who enjoy a collectible hunt with real stakes — the 50-jewel run is a whole-game commitment — and Quintet completists filling the gap between Soul Blazer and Terranigma.
Think twice if you need your RPGs open, grindable or forgiving: a missed stat jewel or Red Jewel cannot be recovered on the same save, there is no difficulty setting, and the Vampire pair and Babel rematches still stop unprepared players.
How to Play It Today
There is no modern re-release to point you to: as of this writing, the game is not part of the Super Famicom / SNES Nintendo Classics library on Nintendo Switch Online in the major regional catalogues, and no remake has been released — check the current catalogue, as line-ups change. The practical route is an original cartridge: Japanese Super Famicom (the version covered here), North American SNES as Illusion of Gaia, or PAL as Illusion of Time — bearing in mind the PAL version's 50 Hz presentation and its text and boss differences. Cartridge saves rely on a battery now three decades old, so a battery check is worthwhile before a 50-jewel run.
- Original Super Famicom / SNES cartridge:
Find the original Japanese cartridge
Disclosure: The Rakuten and Yahoo! Shopping links are standard shopping links. Enkeisha does not earn a commission from purchases made through these links.
Find original hardware editions on eBay
As an eBay Partner Network affiliate, Enkeisha may earn a commission from qualifying purchases made through these links.
Search eBay listings (affiliate link)
Check the language, region, hardware compatibility, condition and authenticity before buying. Search results may include reproductions; links do not endorse individual sellers.