ActRaiser — Sword First, Then Civilisation: The God Game That Made You Earn Your Own Worshippers
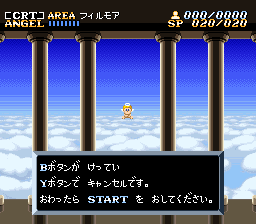
You wake after several hundred years, and your world is gone: the people were wiped out, the land was divided among six lieutenants of evil, and a god with no worshippers has no power. ActRaiser (Quintet / Enix, 1990), one of the very first Super Famicom releases, answers that problem with a structure nobody else was attempting — clear a side-scrolling action stage as an animated warrior statue, then descend as an angel to build the town that stage has made possible, grow its population, and let that population literally level you up for the next fight. This guide maps all six lands and the final island, every boss, the five miracles and their SP costs, and the web of offerings — a bridge built in one land, a skull that seals what hands cannot, a crop carried from one town to another — that decides whether your towns flourish or stall.
A note on names and versions: This article describes the original Japanese Super Famicom cartridge. In Japan you play as God (神) against Satan (サタン); overseas localisation renamed them "The Master" and "Tanzra," softened several difficulty points, and renamed some items — the crop offering is rice in Japan and wheat in the overseas manuals, for example. Where names differ, the Japanese version leads and the overseas name follows. Nothing below is borrowed from ActRaiser 2 (1993), which dropped the building half entirely, or from Actraiser Renaissance (2021), which rebuilds both halves with new systems, new heroes and an extra land — those are different games, signposted only where a modern reader is likely to meet them first.
Quick Facts
| Item | Detail |
|---|---|
| Japanese title | アクトレイザー (Akutoreizā) |
| English title | ActRaiser |
| Platform | Super Famicom / Super NES |
| Release date (Japan) | December 16, 1990 (North America: November 1991; Europe: March 18, 1993) |
| Developer | Quintet |
| Publisher | Enix (now Square Enix) |
| Director / scenario | Masaya Hashimoto / Tomoyoshi Miyazaki |
| Music | Yuzo Koshiro |
| Genre | Action + creation (city-building / god-game) simulation |
| Players | 1 |
| Cartridge | 8 Mbit, LoROM; ROM+RAM+battery — a single battery-backed save (see Strategy Essentials §3) |
| Series position | Quintet's debut title and Enix's first Super Famicom release; followed by the action-only sequel ActRaiser 2 (1993) and the remake Actraiser Renaissance (2021), neither covered as source material here |
Overview
Generations ago, God and Satan fought to a standstill — until Satan arrived with six lieutenants, wounded God, and drove him into a sealed sleep in the Sky Palace. While he slept, humanity was destroyed, the survivors were turned to monsters, and the world was split into six lands, one per lieutenant. Centuries later God wakes healed but powerless: faith is his strength, and there is nobody left to believe. The recovery plan is the game. Descend into a stone warrior statue and purify a land's first action stage (ACT-1); create a first couple at the temple of the cleansed land; then, controlling the Angel in what the Japanese version calls Creation Mode, direct the people's building, defend them with bow and miracle, and grow a town out of wilderness. When every monster lair in the land is sealed, the lieutenant itself can be challenged in ACT-2. Clear all six lands, and a seventh island — Death Heim — rises in the north-east sea for the reckoning with Satan himself.
The two halves are not minigame and main game; each feeds the other with hard numbers. The world's total population is your experience: as it rises, your level, hit points and miracle SP rise with it. Towns hand back offerings — battle magic, extra lives, extra magic power, technologies and cures — that the action stages and the other towns depend on. And action performance matters in reverse: your score in a land's acts influences how far that land's population can ultimately grow, so a sloppy clear quietly caps a town you have not built yet.
The Japanese version is also the hard one: contact damage is unforgiving, post-hit invincibility is short, and spike pits kill outright — the overseas versions softened exactly these points (spikes there cost HP rather than a life, spells were made cheaper, more time was allowed), which is why overseas guide numbers do not always transfer. Where this guide's figures come from overseas-version sources, it says so.
Why It Still Matters
ActRaiser arrived within a month of the Super Famicom itself and immediately made two arguments for the new hardware. The first was structural: in 1990, bolting a god-game town builder onto a platform action game — and making each half the other's progression system — was genuinely without precedent on a console, and the loop it invented (fight to unlock building, build to power the fighting) still reads as a design idea modern games borrow piecemeal. Quintet itself split the inheritance: ActRaiser 2 pursued the action alone, while Soul Blader (Soul Blazer) pursued the rebuilding-the-world theme into an action RPG.
The second argument was sonic. Yuzo Koshiro's score — orchestral in ambition, built from brass and strings coaxed out of a 64 KiB audio buffer — became the early proof of what the machine's sample-based sound could do, famous enough that fellow composers of the era spoke of it as an industry event, and substantial enough to earn a soundtrack album in January 1991 and a symphonic arrangement the same year. Play the Fillmore creation theme and then an ACT stage back to back and the game's whole thesis is audible: peace and war, scored by the same orchestra.
Highlights
- Two games, one power curve. Population is experience. Every house you guide into existence raises the level, HP and SP of the statue you will send into the next ACT — and every sealed lair raises the town's culture level, unlocking denser, earthquake-proof housing.
- A world knitted together by offerings. Bridge technology learned in Fillmore opens Bloodpool's far bank; Bloodpool's rice transforms other lands' fields; a herb found in Marahna is the only cure for Kasandora's plague; Kasandora's ancient tablet unlocks Marahna's expedition island. No land is an island, mechanically — except the ones an earthquake joins together.
- Miracles as tools, not fireworks. Lightning clears scrub and reveals hidden lairs, rain turns desert to grassland, sunlight dries marsh and melts snow, wind empties a sky of monsters, and an earthquake — at 160 SP, the price of sixteen lightning bolts — rebuilds a whole town's housing stock by destroying it.
- An ending that questions the premise. Finish the fight and the game does not simply celebrate you: it shows you temples standing empty, in a world that no longer needs its god. Few 1990 cartridges end on an idea like that.
Strategy Essentials
1. The loop: ACT-1 → Creation → ACT-2, six times, then Death Heim
Every land runs the same three-beat cycle, and the order is fixed — a land's Creation Mode cannot start before its ACT-1, and its ACT-2 does not exist until all four of its monster lairs are sealed.
SKY PALACE (choose land, equip one battle magic, save)
   │
   ├─ ACT-1  Action: fight through as the warrior statue, beat the Act-1 boss
   │     └─► CREATION MODE opens: a temple, and the first couple, appear
   │
   ├─ CREATION  Angel: direct building, shoot down monsters, work miracles,
   │     seal all 4 monster lairs, collect the land's offerings,
   │     raise world population → your LEVEL / HP / SP rise
   │     └─► ACT-2 unlocks (you may first go and open other lands instead)
   │
   └─ ACT-2  Action: beat the land's lieutenant → land cleared
   │
   × 6 lands  ──►  DEATH HEIM rises: Act-2 boss rush, then Satan
Three consequences follow. First, retreat is a strategy: nothing forces you to take a land's ACT-2 the moment it unlocks — opening other lands, building their towns and banking levels first is explicitly viable, and the intended answer to several hard lieutenants. Second, the statue's resources are per-attempt: lose all HP and you lose one retry, your score resets to zero, and (because score feeds a land's population ceiling) a death is never quite free. Third, magic is a loadout, not a menu: at the Sky Palace you equip exactly one of your battle spells before descending, and each casting consumes MP — choose per boss, using §5 and §6, not per habit.
2. The six lands: structure, terrain, and what each one teaches
Fillmore is the only land open at the start; the rest open as your level rises. The "town" of each land is the settlement that grows outward from its temple — there are no separately named towns to visit — so the land name is the town name throughout this guide.
| # | Land (JP / EN) | Terrain & creation problem | ACT-1 boss | ACT-2 boss (the lieutenant) | Signature exchange |
|---|---|---|---|---|---|
| 1 | Fillmore (フィルモア) | Meadows and forest; scrub to clear, a river to cross | Centaur, the lightning knight | Minotauros, the axe-throwing beast king | Invents Bridge technology after 3 lairs are sealed — carry it everywhere |
| 2 | Bloodpool (ブラッドプール) | Marsh around a blood-red lake; a castle on its shore | Manticore | Wolf Zeppelin, the vampire wolf-noble | Learns rice; the boy Teddy's quest yields the Magic Skull, the only way to seal the Red Demon lair |
| 3 | Kasandora (カサンドラ; EN: Kasandora) | The largest land, and a desert: rain is development | Dagoba, the burrowing desert horror | Pharaoh, the golden king in the pyramid | Harmonious Music for Bloodpool's quarrel; the Ancient Tablet for Marahna; a plague after ACT-2 that only Marahna's herb cures |
| 4 | Aitos (アイトス) | Volcanic highland; rock and scrub, stopped windmills | Seiryū, the azure serpent-dragon of the waterfall | Kaensha, the flaming wheel | Sheep's Fleece — Northwall cannot finish without its warmth; the game's only sword-wave item hides in ACT-1 |
| 5 | Marahna (マラーナ; EN: Marahna) | Humid tropical island chain; palm and marsh, islands to join | Rafflesia, the man-eating flower | Kalia, the six-armed serpent god | The Herb that cures Kasandora; the tablet expedition yields Magical Aura |
| 6 | Northwall (ノースウォール) | Snow and ice wall; the frozen lake, the great tree | Merman Fly | Frost Wyvern (EN guides: Arctic Wyvern) | Fleece from Aitos ends the cold crisis; melting the lake yields Magical Light |
| — | Death Heim (デスヘイム) | Satan's risen island; no Creation Mode | — | All six lieutenants again, strengthened — then Satan (EN: Tanzra), two forms | The sword-wave power is granted automatically for the final battle |
Boss names need one caution: the English names in overseas guides vary — Aitos ACT-1's boss appears as both "Serpent" and "Aquatic Dragon," Northwall ACT-2's as "Arctic Wyvern" and "Ice Dragon," and Bloodpool ACT-2's as "Zeppelin Wolf" and simply "the Wizard." The Japanese names in §5 are the stable reference; the variants name the same fights.
3. Creation Mode: lairs, sealing, and how a town actually grows
The Angel's war. You do not build; you direct. Place a direction and the people extend roads and buildings up to eight blocks at a time from the temple, raising houses and fields as they go. Meanwhile each unsealed lair continuously spawns one type of flying monster, and those monsters work against the town in character: Napper Bats kidnap people (shoot the bat and the captive is freed), Blue Dragons burn houses down with lightning, Red Demons dry up fields, and Skull Heads — durable, and the worst of the four — trigger earthquakes. The Angel shoots them down with arrows; every kill earns SP for miracles, every contact costs the Angel HP, and an Angel at zero HP cannot fire until time restores it. Defend first, direct second: a town left unwatched shrinks.
Sealing is the progression gate. When a road you directed reaches a lair, the people seal it — provided the land's population has grown enough for them to attempt it. Each land has exactly four lairs:
| Land | Lair 1 | Lair 2 | Lair 3 | Lair 4 (special) |
|---|---|---|---|---|
| Fillmore | Napper Bat | Napper Bat | Blue Dragon | Napper Bat — across the river; needs the Bridge the people invent after the third seal |
| Bloodpool | Napper Bat | Blue Dragon | Blue Dragon | Red Demon — hidden under scrub; cannot be sealed by hand: reveal it with Lightning, then use the Magic Skull offering |
| Kasandora | Blue Dragon | Red Demon | Napper Bat | Red Demon — lairs hide under sand; rain the desert green to expose them |
| Aitos | Blue Dragon | Blue Dragon | Skull Head | Blue Dragon — seal in order; the Skull Head's earthquakes wreck a young town, so Bomb! and Strength of Angel offerings earn their keep here |
| Marahna | Blue Dragon | Napper Bat | Red Demon | Blue Dragon — on the north-west island; an Earthquake joins the islands so the people can reach it |
| Northwall | Red Demon | Skull Head | Skull Head | Blue Dragon — two Skull Head lairs at once is the harshest defence brief in the game; seal order matters more than speed |
How population — and therefore you — grows. Sealing lairs raises the town's culture level (maximum 3; level-3 houses are earthquake-proof and hold the most people). Fields feed growth, and better fields feed more: use Bloodpool's crop offering on a land's first field and that land's agriculture converts — rice paddies in the Japanese version, wheat in the overseas versions — with later fields following suit. Population speed is reported as None / Slow / Normal / Stop / Max; "Stop" is a diagnosis, not a fate — an unsolved problem (a stopped windmill, a missing fleece, a quarrel, a plague) is almost always the cause, and §6 lists the keys. Your level is computed from total world population, and fan guides dedicated to maximising population put the ceiling at level 17; this guide does not print per-land maximum populations, because published figures conflict between versions and sources (see the note at the end of §6). Save via the Progress Log command — the battery holds one save only, and every new save erases the previous one.
Forcing the housing ladder. Late in a land's growth, old low-culture houses cap the population. The intended, if ruthless, solution is demolition: Lightning removes individual buildings, and once a town's culture has risen, an Earthquake destroys the fragile early housing (and non-wheat/rice fields) across the whole map, letting the people rebuild at the current culture level. It costs 160 SP and some of your people's homes — the manual itself lists "allow the Blue Dragons to destroy the homes for you" among the methods, with the dry warning that you will sacrifice lives doing this.
4. Miracles: the five tools and their SP costs
Miracles are available from the first Creation Mode, but SP is earned slowly at first — by the Angel's kills — so early miracles are a budget, not a reflex. Costs below are confirmed by the overseas manual and agree with the long-circulated FAQ literature; effects are where the strategy lives.
| Miracle | SP | What it does | Where it earns its cost |
|---|---|---|---|
| Lightning | 10 | Destroys scrub, palm trees, rocks — and houses and fields — on the targeted square; can kill a monster standing there | The default clearing tool; reveals lairs hidden under scrub (Bloodpool) or sand; knocks the Magical Fire offering loose in Fillmore; striking Northwall's own temple shakes loose a Source of Life |
| Rain | 20 | Turns desert into grassland, restores dried fields, douses fires | Kasandora cannot develop without it; raises Bloodpool's lake for a Source of Life; answers Aitos' injured leader at the temple |
| Sunlight | 30 | Dries marsh, melts snow and ice | Bloodpool's marshes and Northwall's tundra and frozen lake (melting the lake starts the fishing that yields Magical Light) |
| Wind | 80 | Blows every flying monster in the land away at once; also turns what needs turning | The emergency reset when the Angel is overwhelmed; restarts Aitos' windmills and un-stalls its town |
| Earthquake | 160 | Map-wide: destroys fragile houses and unconverted fields; can alter the land itself | The housing-ladder reset of §3; joins Marahna's islands; collapses a Kasandora pyramid wall to reveal a Source of Life |
In text form, the budget logic:
SP in ── Angel's arrow kills (and only that, at first)
SP out ─ Lightning ×1 = Rain ×0.5 … plan backwards from the big two:
         Wind (80) = 8 Lightnings   •   Earthquake (160) = 16 Lightnings
Rule: never sit on a full SP bar in a land whose lairs are all open —
      banked SP kills nothing; a Wind at the right minute saves a town.
5. Bosses: all twelve guardians, Death Heim, and Satan
The statue fights with a sword (standing, crouching and jumping attacks), short post-hit invincibility, and the one battle spell you equipped. Boss HP figures below follow one long-running fan site's table for the overseas version — most bosses at 24 HP, Aitos' pair at 21, Satan's second form at 40. Treat them as scale, not gospel: the Japanese version's tuning differs in the player's disfavour, and no comparably complete Japanese-version HP table is published. The patterns, which every source agrees on, are what to plan around.
| Boss (JP name / EN name) | Where | Pattern | Counter-play |
|---|---|---|---|
| Centaur, the Lightning Knight (紫電の魔騎士セントール) | Fillmore ACT-1 | Spear raised: lightning strikes the ground; spear levelled: a charge | Hold near the wall through the lightning, then close and strike before the next cast; do not chase the charge — let it pass and punish the recovery |
| Minotauros (魔斧の獣王ミノタウロス) | Fillmore ACT-2 | High jumps; on landing, throws its axe forward | Move out from under the jump, wait out the axe throw — the axe's absence is your window — then slash and reset |
| Manticore (紅湖の魔獣マンティコア) | Bloodpool ACT-1 | Leaps between bridge platforms over the red lake, spitting fireballs at the platform it leaves | Never share his side; vacate the platform he targets. The pit, not the fire, is what kills here |
| Wolf Zeppelin (月夜の魔貴族ウルフ・ツェッペリン) | Bloodpool ACT-2 | Teleports, calls three lightning bolts, then — at half health — transforms into the wolf: lunges and wolf-head projectiles | Attack only after the third bolt. The wolf form shares the same HP bar; there is no recovery to undo, so stay aggressive but grounded |
| Dagoba (砂塵の甲虫ダゴバ) | Kasandora ACT-1 | Burrows through sand pits; claws and a rock storm when it surfaces | It can only be hurt while surfaced. When it dives, climb to the dune tops or its claws tax you for standing low |
| Pharaoh (霊廟の黄金王ファラオ) | Kasandora ACT-2 | Drops to crush you; glowing orbs that become arrow turrets on the walls; fireballs | Magical Stardust — earned in Bloodpool — is famously decisive here. Without it: dodge the drop, jump the fireballs, and clear turrets before they multiply |
| Seiryū, the Azure Dragon (蒼炎の蛇龍 蒼龍; EN guides: Serpent) | Aitos ACT-1 | Charges across the waterfall arena, firing energy beams | Take the sword-wave item earlier in this same act (see §6): with it you can stand centre and answer every pass with a beam of your own |
| Kaensha, the Fire Wheel (灼熱の魔環 火炎車; EN: Fire Wheel) | Aitos ACT-2 | Rolls the arena's platforms, shedding fireballs, five-way bursts from above in the Japanese description | Work the platform ladder: strike from the second-lowest as it passes, retreat to the highest as it climbs, drop and repeat. Never meet it on its own level at speed |
| Rafflesia (人食いの妖花ラフレシア) | Marahna ACT-1 | Rooted; ground tentacles that react to you, spore attacks; only its periodically exposed core takes damage | Kill the left tentacle for a safe footing, then spend your whole offence on the core's openings — hits elsewhere do nothing at all |
| Kalia (魔淀の蛇神カーリア) | Marahna ACT-2 | Ground-running magic rays, spiked platforms dropped from above, sudden dives | Ride a falling platform up to strike, and be off it before the spikes above matter; when it dives beneath you, run — the re-emergence is the attack |
| Merman Fly (氷窟の零魔マーマンフライ) | Northwall ACT-1 | Flies over freezing water that slows you, dropping shots; a partner adds fireballs; swoops to slash | Watch the partner, not the boss, during the overflight; your hits come when it swoops — meet the face with the sword |
| Frost Wyvern (極北の神竜フロストワイヴァーン; EN: Arctic Wyvern) | Northwall ACT-2 | Ice shots that shatter into four directions on landing; low strafing passes | Strike as it comes in low after an ice shot; Magical Aura (from Marahna) covers the approach if your timing is not there yet |
| Satan (深淵の魔王サタン; EN: Tanzra) — form 1 | Death Heim | A floating head: stardust rain, fire beams; vulnerable only when the mask settles solid on the floor | You are granted the sword-wave for this battle — beam him at the screen's edge, and empty your sword work into every grounded moment; by about the third landing the form should fall |
| Satan — form 2 | Death Heim | Roughly double the first form's endurance in fan tables (40 HP); fireballs and blue fire; can only be hit while it is itself attacking | The whole game in one rule: do not swing at a guarded Satan. Dodge the volley, take the opening his attack gives you, and budget your remaining magic scrolls (MP) for this form, not the rush before it |
Death Heim discipline. The final island is a boss rush with no Creation Mode and no regeneration between fights: the six lieutenants — Minotauros, Wolf Zeppelin, Pharaoh, Kaensha, Kalia, Frost Wyvern — return strengthened and faster, in land order. You begin with the magic scrolls (MP) you have collected, up to seven, and every casting is spent for good. The standing advice of the walkthrough literature is therefore economic: at most one spell per lieutenant, and hold Magical Stardust as your reserve — it is the rush's most reliable boss spell. Dying restarts the single fight you lost — except against Satan's second form, which sends you back to his first.
6. The statue, the spells, and the offerings that matter
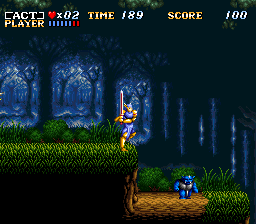
In the action stages, the blue angel statues hold the pickups: a whole Apple restores all HP (a half apple, a quarter), Scrolls add 1 MP each, the Crush orb destroys every on-screen enemy except bosses, crowns and gems are pure score — and score, recall, feeds population ceilings. One pickup is unique: the sword-wave item in Aitos ACT-1, which makes every swing loose a crescent projectile (and, in the Japanese version's account, lets a hit count double) for the rest of that life. It never appears again — except granted automatically against Satan.
Battle magic is earned as offerings, one spell per land that grants one, and equipped singly at the Sky Palace. MP costs below are the Japanese version's, as listed in Japanese references; the overseas versions reduced spell costs across the board, which is why overseas manuals describe every casting as costing a single point's worth of magic in simplified terms — do not import overseas costs into a Japanese-version run.
| Spell | From | MP (JP) | Effect and best use |
|---|---|---|---|
| Magical Fire (炎の魔法) | Fillmore — Lightning the cliff the people point you to | 1 | Twin fire streams snake out to both sides; modest damage, ideal against grounded, bulky targets that stay in the stream |
| Magical Stardust (星屑の魔法) | Bloodpool — after the Magic Skull seals the Red Demon lair, the people fish it from the purified lake | 2 | A meteor shower rakes from the upper-right to the lower-left; the strongest all-round boss spell — position so the boss stands in the fall line, and note the meteors do not pass through floors |
| Magical Aura (オーラの魔法) | Marahna — give Kasandora's Ancient Tablet, then Lightning the tree on the expedition island | 3 | Paired orbs spiral outward on both sides; devastating at point-blank against bosses that must come to you — and wasted at range |
| Magical Light (光の魔法) | Northwall — melt the frozen lake with Sunlight and wait for the fishing boat to return | 4 | A pillar of light splits and sweeps both ends of the screen; no hiding place for anything on it — the panic button and the finisher |
Offerings are held at most eight at a time, and most are consumed on use — the inventory pressure is real, so take offerings promptly and spend deliberately. The complete working set, by land of origin:
| Offering | From | What it is for |
|---|---|---|
| Bomb! (輝きの玉) | Every land, typically an early seal | In Creation Mode, destroys every monster on the current screen — lairs themselves are untouched. A screen-saver, not a seal-substitute |
| Strength of Angel (天使の力) | Fillmore, Kasandora, Aitos, Marahna, Northwall | For a limited span the Angel's arrows hit with four times their power — the Skull Head answer |
| Source of Magic (魔法の源) | Several lands (Fillmore gives two) | Use it and your starting MP in action stages rises by one, permanently — the quiet backbone of every Death Heim budget |
| Source of Life (命の源) | Fillmore, Bloodpool, Kasandora, Northwall — each behind a trick (see below) | +1 retry in action stages, permanently |
| Bridge (橋の技術) | Fillmore, after three lairs sealed | Give it to a land and its people can build across rivers — required in Bloodpool and Northwall; Marahna's people, alone, invent it themselves |
| Rice (米; EN manuals: Wheat) | Bloodpool, unlimited once learned | Converts a land's fields to the high-yield crop; every field planted afterwards follows |
| Loaf of Bread (ひと切れのパン) | Bloodpool | For Teddy, the lost boy — returning him earns the Magic Skull |
| Magic Skull (破壊の骸骨) | Bloodpool, via Teddy | Seals the one lair human hands cannot: Bloodpool's Red Demon |
| Compass (羅針盤) | Bloodpool | One use only, two destinations: in Fillmore the deep-sea fishing finds a Source of Life; in Marahna it finds a Source of Magic. Choose — you cannot have both |
| Harmonious Music (素敵な音楽) | Kasandora, from the desert wanderers | Ends the quarrel that stalls Bloodpool after its ACT-2 |
| Ancient Tablet (古い石板) | Kasandora, after the plague is cured | Unlocks Marahna's expedition to the bird-shaped island — and therefore Magical Aura |
| Sheep's Fleece (羊の毛皮) | Aitos, once the people take to the mountains | Clothing against Northwall's cold; its people's request for warmth stalls the town until you deliver it |
| Herb (薬草) | Marahna, as its temple town grows | The only cure for Kasandora's post-ACT-2 plague — which must be cured before the Tablet appears |
The four hidden Sources of Life deserve their own checklist, because the game barely hints at them: Fillmore — use the Compass there and let the people fish the deep water; Bloodpool — after the skull seal, Rain on the lake until a fisherman finds one; Kasandora — uncover the pyramid, then Earthquake it and search the rubble; Northwall — Lightning your own temple, and a worshipper sheepishly hands over the jewel he had been keeping. Four extra retries, all missable, all earned in Creation Mode rather than in any action stage — the game's thesis in miniature.
A note on numbers not printed here: per-land maximum populations and the exact action-score thresholds that set them are given differently by different fan guides and differ again in the overseas versions (whose simulation half was made harder to maximise). Rather than print one source's table as fact, this guide gives you the levers those numbers respond to — culture level, crop conversion, housing demolition, and action score — which are consistent across every source consulted.
Who It's For
Players who like their action games with a second, slower verb — who finish a boss fight and want to be handed a town to show for it. God-game and city-builder players curious about the console ancestor that did population-as-experience in 1990, with a five-miracle toolbox and no tax sliders anywhere. And Super Famicom completists working the launch window: this is Enix's first game for the machine and Quintet's first game at all, and the distance between it and Soul Blader two years later is one of the clearest design lineages on the system. It is not for players who want the action alone at full intensity — that is ActRaiser 2's different offer — nor for anyone expecting modern quality-of-life: one save file, one equipped spell, and a god who must demolish his own people's houses to house them better.
How to Play It Today
This guide covers the original Japanese Super Famicom cartridge. Check the label and the seller's photos; the Japanese cartridge is the common, inexpensive form of the game. Download history, stated carefully because catalogues change: the original reached the Wii Virtual Console in 2007 (Japan March 20, Europe April 13, North America May 28) and that service closed in January 2019, so it is no longer purchasable there. In the November 2026 listings, the original game was not part of the Nintendo Switch Online Super Famicom library — verify the current catalogue before assuming either way. The widely available modern option is Actraiser Renaissance (2021, Switch / PS4 / Windows / iOS / Android), a remake that keeps the two-part structure but changes systems, adds heroes and a seventh land, and re-records the score with its composer — an excellent game to play after, or instead, but not a substitute for the specifics above. The overseas SNES and Virtual Console versions are also legitimately different games in tuning (see the version note at the top): easier action, stingier simulation, and — in North America — an action-only Professional! mode unlocked by clearing the game.
Find the original Japanese cartridge
Disclosure: The Rakuten and Yahoo! Shopping links are standard shopping links. Enkeisha does not earn a commission from purchases made through these links.
Find original hardware editions on eBay
As an eBay Partner Network affiliate, Enkeisha may earn a commission from qualifying purchases made through these links.
Search eBay listings (affiliate link)
Check the language, region, hardware compatibility, condition and authenticity before buying. Search results may include reproductions; links do not endorse individual sellers.