Rudra no Hihou (Treasure of the Rudras, Super Famicom, 1996) — The RPG Where You Invent the Spells by Typing the Words
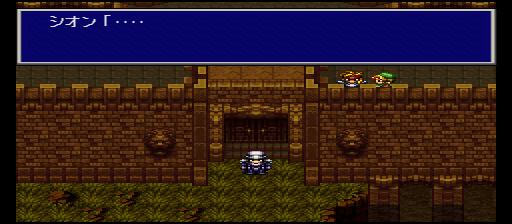
Every RPG hands you a spell list. Rudra no Hihou hands you a blank page and a keyboard. Square's last self-developed Super Famicom RPG, released in Japan in April 1996, builds its entire magic system — the kotodama (言霊, "word-spirit") system — around one audacious idea: there is no spell shop and no level-up spell table, because any word you type becomes a spell, and the game secretly knows what almost all of them do. Wrapped around that experiment is a second one: three separate heroes living through the same final fifteen days of humanity, in scenarios you can play in any order, whose actions quietly rewrite each other's stories. This guide is about making both experiments work for you.
A note on names and spellings: This game was never officially released outside Japan, so it has no official English title. Treasure of the Rudras is the widely used fan rendering of ルドラの秘宝 (Rudra no Hihou, also romanised Rudora no Hihou), and this article uses it in that sense only. The same caution applies to spell names: in the original cartridge you enter mantras in katakana, up to six characters. The roman-letter spellings used in the tables below (Ig, Aqu, Teo…) follow the conventions of English-language mantra guides and the fan translation, so that readers can recognise the patterns; the underlying system described is the original Super Famicom one.
Quick Facts
| Item | Detail |
|---|---|
| Original title | ルドラの秘宝 (Rudra no Hihou / Rudora no Hihou) |
| English title | Treasure of the Rudras — fan-used rendering; no official English title or release |
| Platform | Super Famicom |
| Release date (Japan) | April 5, 1996 |
| Developer | Square (Osaka division) |
| Publisher | Square |
| Genre | Role-playing game |
| Players | 1 |
| Cartridge | 32 Mbit (4 MB), HiROM FastROM, ROM + RAM + battery — battery-backed save; internal title "RUDORA NO HIHOU"; Japanese version, revision 0 |
| Director | Kouji Ide |
| Character design | Keita Amemiya |
| Music | Ryuji Sasai |
| Re-releases | Japan-only cartridge; later re-released in Japan on the Wii Virtual Console (June 7, 2011) and Wii U Virtual Console (December 2, 2015), both storefronts now closed |
Overview
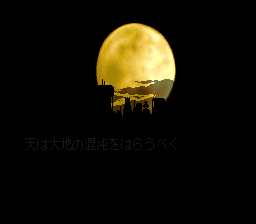
Every 4,000 years, a Rudra comes, a new race rises, and the race before it is destroyed or driven to the edge of extinction. The Danans were succeeded by the Merfolk, the Reptiles and the Giants; the fossilised Rudras of those ages survive as the Lago Stones that scholars dig up and argue over. Humanity's turn is next, and when the game opens, fifteen days remain.
Four people come into possession of a Jade — a treasure found in the Lago Stones — and the story is told through three main scenarios, one each for the soldier Sion, the archaeologist Surlent and the priestess Riza, plus a final scenario built around the thief Dune, the fourth Jade-bearer, that unlocks once all three main scenarios are complete. You may play the three scenarios in any order and switch between them; the days tick forward as each scenario's story advances, and the scenarios genuinely interlock. A relic one party leaves behind can be picked up by another party days later; a pair of treasure hunters who rob Surlent in his opening chapters are the same pair Sion's party keeps crossing; an event that is a mystery from one side of the world is an explained catastrophe from the other.
Underneath, this is recognisably a late Square RPG — overworld, towns, mazelike dungeons, random encounters, turn-based battles with a party of up to four — built, unusually, on technology rooted in the Final Fantasy V generation rather than the flashier contemporary builds, with animated enemy sprites that still stand out on the system. What makes it unlike anything else Square shipped is the magic.
Why It Still Matters
Rudra no Hihou was developed by Square's Osaka division over roughly three years from 1993, by a team whose core had worked on Final Fantasy Legend III (SaGa 3) and Final Fantasy Mystic Quest, and director Kouji Ide has said the team started from the magic system: the kotodama idea grew out of Japanese wordplay culture, and battle planner Masahiro Kataoka proposed that players would exchange discovered words with their friends as a way to progress. In 1996, that made the game a social, notebook-and-rumour RPG — a spell list written by its own community. Nothing else on the Super Famicom, and very little since, has trusted players with a magic system that is genuinely authored at the input screen.
It was also a farewell. Released on April 5, 1996, it was Square's last self-developed game for the Super Famicom, arriving within four months of Bahamut Lagoon, Super Mario RPG and Treasure Hunter G as the company's 16-bit era closed. It was never localised — reporting on the game has long identified the mantra system itself, which required re-engineering the game's code and not just its text, as a major obstacle — and Western players know it through a completed English fan translation instead (see How to Play It Today). Famitsu scored it 31/40 on release, and retrospective coverage has consistently singled out the same two things this guide focuses on: the word-built magic and the three interlocking storylines.
Highlights
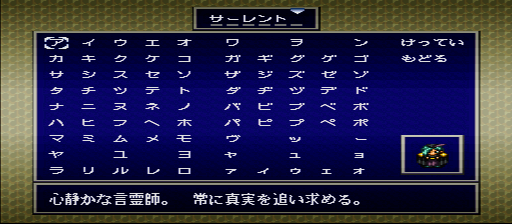
- Magic you type, not magic you unlock. Every character's spell list is a grimoire you fill in yourself, from the first hour to the final boss. A word that works works for lore reasons the game never fully explains — and copying down an enemy's spell mid-battle and enscribing it afterwards is a designed way to learn.
- Three scenarios, one calendar. Sion's war against the Rudra cult, Surlent's ruin-diving investigation of the Great Cycle and Riza's pilgrimage to cleanse a polluted world run concurrently over the same fifteen days, cross-referencing each other constantly.
- A world with an expiry date. The 4,000-year cycle, the fossil Rudras, the Danan prophecies and the weapon Sodom waiting on the Moon give the game a cosmology that the three scenarios each reveal a different face of.
- Keita Amemiya's designs and Ryuji Sasai's score. The character and monster art — Amemiya is better known for tokusatsu design work — gives the game a look unlike Square's other 16-bit RPGs, and the soundtrack (released on CD in Japan shortly after the game) is one of the system's late highlights.
Strategy Essentials
1. The Kotodama System: How a Typed Word Becomes a Spell
You create mantras from the menu's Enscribe command: pick an empty slot (or edit an existing mantra), type a word, and the game tells you what it does — its effect, element, targeting and MP cost — before you commit to keeping it. Nothing is consumed by experimenting, so the first rule of Rudra no Hihou is to experiment constantly.
In the original cartridge the entry is up to six katakana characters. A complete mantra has three conceptual parts:
  [ prefix(es) ]  +  [ CORE ]  +  [ suffix ]
        │                 │              │
  strengthens or     decides the    sets the tier:
  modifies what      element and    power, targeting
  follows            basic effect   and MP cost
The game parses what you typed from the end: the longest dictionary word matching the end of your entry becomes the base word, which sets the mantra's initial effect, element, targeting, power and cost. Whatever remains at the front is then read, piece by piece, as prefixes, and each prefix tries to modify the base — raising or lowering power and MP cost, changing the effect, or changing the targeting. Japanese guides summarise the same rule from the player's side: the strengthening word goes first, the effect word goes last — to make a spell you like stronger, add words to its head, not its tail.
The eight elements, plus healing. There are eight offensive elements and a separate healing family. Six of the eight form opposed pairs; earth and void have no partner.
| Element | Core word | Opposed element | Notes |
|---|---|---|---|
| Fire | Ig | Water | |
| Water | Aqu | Fire | |
| Wind | Teo | Lightning | |
| Lightning | Tou | Wind | |
| Light | Soa | Dark | Often called "Holy" in fan guides |
| Dark | Sere | Light | |
| Earth | Pra | — | No strengths or weaknesses |
| Void | Nihi | — | No strengths or weaknesses |
| Healing | Lef | — | Not an offensive element; the base for cures |
Element choice matters twice. In battle, hitting an enemy with the element opposed to its own is the reliable way to deal serious damage, while striking with its own element is blunted — habitat is a fair first guess (an ice mountain suggests water, the underworld suggests dark), and testing confirms it. And inside mantra creation itself, detailed mechanics guides describe an element penalty: a prefix whose element matches the base gets its full effect, a prefix of an unrelated element contributes at reduced strength, and a prefix of the opposed element is nullified and drags the whole mantra's power down with it. Exact internal arithmetic has documented exceptions, so treat this as the working model rather than a promise — but it explains most "why did my great idea come out weak?" moments: you probably bolted a water word onto a fire spell.
The suffix ladder: your first working spell kit. Adding a recognised suffix to a core word raises its tier in a predictable pattern. This single table, consistent across English mantra guides, is enough to equip a party for most of the game:
| Form | Target | MP | Fire | Water | Wind | Lightning | Light | Dark | Void | Earth |
|---|---|---|---|---|---|---|---|---|---|---|
| Core alone | Single | 1 | Ig | Aqu | Teo | Tou | Soa | Sere | Nihi | Pra |
| Core + na | All | 2 | Igna | Aquna | Teona | Touna | Soana | Serena | Nihina | Prana * |
| Core + rex | Single | 5 | Igrex | Aqurex | Teorex | Tourex | Soarex | Sererex | Nihirex | Prarex |
| Core + nates | All | 9 | Ignates | Aqunates | Teonates | Tounates | Soanates | Serenates | Nihinates | Pranates |
| Core + god | Single | 12 | Iggod | Aqugod | Teogod | Tougod | Soagod † | Seregod | Nihigod | Pragod |
* Prana produces a Void mantra, not an Earth one. † Soagod produces a Dark mantra, not a Light one. These two exceptions are documented in mantra guides and are the standing warning of the whole system: most combinations behave, some do not, and the only way to know is to read the result screen before you rely on a new mantra in a boss fight. MP costs in the table are the standard values; guides note they can vary slightly by character and circumstance.
Prefixes: where the real crafting happens. Beyond the suffix ladder, prefixes are how you tune a spell:
| Prefix behaviour | What it does to the base | How to use it |
|---|---|---|
| Power / cost adjuster | Raises or lowers power and MP cost together, in steps | The basic volume knob: stack compatible prefixes on a boss-tier base, strip them for a farming version |
| Cost cutter | Lowers MP cost, usually at the price of power | How cheap everyday versions of strong spells are made; the classic trade of the system |
| Effect applier | Replaces or overwrites the mantra's effect with the prefix word's own effect (damage type, healing, status, buff) | How support mantras are built — start from a suitable base and apply the effect you actually want |
| Targeting changer | Switches single ↔ all, or locks targeting | Turns a boss spell into a crowd spell (or the reverse) without changing its element |
| Power reset | Sets power to a fixed value regardless of what came before | Order-sensitive: anything applied before a reset is wasted, so resets belong early in the word |
| Element-resist builder | Built on the [element] + reem-type pattern in guides, produces protection against that element | Enscribe one of these for a boss's main element before the fight — see the boss table below |
Cost management — the habits that separate a working grimoire from a word list:
- Build two tiers per element. A 2 MP all-target na-form for random encounters and a 5 or 12 MP single-target rex/god-form for bosses covers most situations. Carrying only the expensive tier bankrupts casters with small MP pools; carrying only the cheap tier stalls boss fights.
- Short is cheap, long is strong — usually. The system rewards compact, efficient words. When two mantras do the same job, keep the one that does it for less MP, and retire the other.
- Keep healing cheap above all. In the Japanese original, the famous party-heal is コペベレフナ (Kopebelefna in roman letters), prized precisely because it restores the whole party for very little MP, and ペコアニムス (Pekoanimusu) is the standard single-target revival word in Japanese guides. Whatever your cheapest full-party heal and revive turn out to be in your version, enscribe them on more than one character — a healer who falls with the only cure is a reset.
- Test new mantras on trash enemies, not on bosses. The result screen tells you effect and cost, but only a live cast tells you how a spell feels against real defences — and a mistyped or exception-hit mantra (see Prana and Soagod above) discovered mid-boss-fight is an expensive lesson.
2. Learning New Words: The Four Sources
Nobody hands you a spell list, but the game is generous with words — if you collect them.
| Source | How it works | Habit to build |
|---|---|---|
| NPCs and teachers | Characters across the world teach words outright, and new dialogue appears as events progress | Talk to everyone, and revisit towns after major events in any scenario |
| Books, signs and inscriptions | Written words in the world — on bookshelves, monuments, notices — are often valid mantras, including unique "special word" mantras that skip the core/suffix pattern entirely | Read everything; write down anything that looks like a name or a term of power |
| Enemies and bosses | When an enemy casts a mantra, its name is shown. Note the exact spelling and enscribe it after the battle — it becomes yours | Keep a notebook (in 1996, literally). Boss mantras in particular include powerful and space-efficient spells, though many are less cost-efficient than the basic ladder |
| Your own experiments — and other scenarios | Any word you type produces some effect; the internal dictionary gives defined effects to a large stock of real words, and words from other games, names and puns often do something | Knowledge is the player's, not the character's: a word you hear in Riza's scenario can be enscribed by Sion's party. Rotating scenarios is itself a way to gather mantras — Japanese walkthroughs recommend exactly this, for example carrying a word learned on Riza's route into a hard fight on Sion's |
3. The Three Scenarios and the Final Chapter
| Scenario | Lead | Starting position and story shape | What it contributes |
|---|---|---|---|
| Sion | Soldier | A castle soldier whose sword master vanished a year earlier while pursuing the Rudra cult. The most conventionally martial scenario: war, tournaments and the cult's strongholds, with Sion chasing strength as much as truth | The military view of the crisis — what the cult is doing, and what it costs to fight it head-on |
| Surlent | Archaeologist | Assistant to a Lago Stone researcher, hired to recover ancient treasures — beginning with a Holy Grail that a pair of thieves promptly steals from under his nose. A ruin-by-ruin investigation that becomes a direct encounter with the Great Cycle itself | The explanatory view: the Danans, the previous races, the Lago Stones and the machinery of the 4,000-year cycle |
| Riza | Priestess | A village girl born with a Jade set in her forehead, regarded as a chosen one. She leaves home to cleanse the world's pollution — air, sea and earth — following the Danan prophecies, in her missing mother's footsteps | The prophetic view: why the world is polluted, what the prophecies actually predict, and what "saving" it was supposed to mean |
| Final scenario (Dune) | Thief | Unlocks after all three scenarios are cleared. Dune, the fourth Jade-bearer — who has spent the other scenarios stealing the relics everyone else is chasing — takes the lead, the three parties converge, and the combined cast takes on the forces behind the cycle: Gomorrah, the weapon Sodom on the Moon, and finally Mitra | The merged endgame; everything the three scenarios taught you — story and mantra knowledge alike — is spent here |
Practical notes for running the three scenarios:
- The calendar is shared, the clock is story-driven. Each scenario unfolds day by day up to the fifteenth day, and the day counter advances as you clear story milestones in that scenario. Rotating at day boundaries is the easiest way to keep the chronology — and the cross-references — straight on a first run.
- Cross-effects are real, in both directions. Parties affect each other's worlds: objects left, moved or stolen in one scenario are where the other scenario finds them, and chests and Jade-locked secrets are placed with the rotation in mind. If a location feels oddly pre-disturbed, it usually is — by you, in another life.
- Mantra knowledge is your carry-over bonus. Levels and equipment stay with their parties, but you keep every word you have learned. A scenario you play second is played with a first scenario's grimoire in your head, which materially softens its early bosses.
- Don't abandon a scenario at its cliff edge. Each scenario ends its fifteenth day with its own climax, and the final scenario assumes the combined cast. Clear all three before judging any one of them — several famous "plot holes" in Sion's route are Surlent's and Riza's explanations.
4. Bosses and Bottlenecks: Where Runs Stall
| Bottleneck | Why it hurts | Preparation |
|---|---|---|
| The opening days of any scenario | Parties start thin and the protagonist's starting mantras are minimal; Sion in particular is a physical fighter with limited MP, so mantra-based healing is scarce exactly when you are learning the system | Enscribe every word you are taught immediately; stock healing items rather than relying on mantras early; build the cheap na-tier of the suffix ladder before exploring far |
| Ravana, on the Mantra Mountain (Sion's route, late) | A cult boss who attacks with fire and earth mantras, arriving at the end of a climb with little chance to restock | Bring a fire-resist mantra of the [element] + reem family and earth coverage; Japanese walkthroughs also single out having Sion equip the Sigmund sword for this fight, and a word that counters levitation is recommended in guides for his earth attacks |
| The bargain at the Tarlac tavern (Sion's route, Day 14) | A late story transaction with Surlent's party over equipment. Walkthroughs warn that refusing the trade — or giving up the shield — leaves Sion's final Rudra opponent abnormally strong, and the trade is connected to obtaining the anti-Rudra mantra Apocalypse | Save before the tavern. Do the trade. The strongest "optional" decision in the game is not a fight at all |
| Sion's finale: the Next Rudra, then Gomorrah back-to-back | Defeating the next Rudra drops you straight towards the Gomorrah fight; Gomorrah cannot be damaged while its summoned minions are alive, and when its own HP runs low it leans on powerful dark attacks | Heal and re-buff in every window the game gives you between the two fights; kill summons first, always; once Gomorrah itself is exposed and weakened, finish it fast rather than settling into a long exchange |
| Pollution status, from Riza's route onwards | Pollution halves a character's stats and blocks mantra use entirely, and it persists after battle — a polluted caster is a passenger until cured | Carry purification medicine (じょうかやく) and keep a cure word enscribed; dark-element armour prevents it. Note that unlike most statuses in this game, pollution is not cleared by taking an opposite-element hit |
| The final scenario's merged gauntlet | The endgame throws the full elemental spread at a combined party, and a mantra kit tuned to one route's enemies leaves gaps the Moon sequence will find | Before the finale, audit all eight elements: one cheap all-target and one heavy single-target mantra each, resists for fire, lightning and dark at minimum, and your cheapest party heal and revive on at least two characters |
Who It's For
For RPG players who like systems they can interrogate — if the best part of a magic system, for you, is figuring out how it works and then exploiting what you figured out, this is one of the great designs of the 16-bit era, and it is deep enough that fan mechanics guides are still refining the model decades later. For players drawn to multi-perspective storytelling, the three-scenario structure delivers the Live A Live-style pleasure of one event seen three ways, with a denser web of cause and effect. The honest cautions: random encounter rates are of their era, the game explains its own best ideas only in passing (this article exists because the game will not teach you the suffix ladder), and playing the original means playing in Japanese.
How to Play It Today
The original cartridge is the version this article describes; it was a Japan-only release, so expect to shop the Japanese second-hand market, and check the battery-backed save before paying a premium for a boxed copy. Japan also received digital re-releases on the Wii Virtual Console (2011) and Wii U Virtual Console (2015), but both storefronts have since closed, so those versions are only available to those who already own them. There has never been an official release outside Japan. The English fan translation through which most Western players know the game is a remarkable piece of work in its own right — translating this title meant re-engineering the mantra system itself, and in the fan version mantras are entered in roman letters (up to twelve) rather than katakana — but treat its spellings as its own system: the patterns in this article's tables follow it, while individual words from Japanese guides (like the healing words in Section 1) belong to the original cartridge and should be verified in whichever version you play.
Watch the official video
This is Nintendo’s official Japanese-language footage of the original Super Famicom release, shown on Virtual Console, not a remake.
YouTube connects only after you select “Load video”. Playback does not start automatically. Google’s Privacy Policy applies after connecting. Google Privacy Policy
Find the original Japanese cartridge
Disclosure: The Rakuten and Yahoo! Shopping links are standard shopping links. Enkeisha does not earn a commission from purchases made through these links.
Find original hardware editions on eBay
As an eBay Partner Network affiliate, Enkeisha may earn a commission from qualifying purchases made through these links.
Search eBay listings (affiliate link)
Check the language, region, hardware compatibility, condition and authenticity before buying. Search results may include reproductions; links do not endorse individual sellers.