Romancing SaGa 2 (Super Famicom, 1993) — The RPG Where You Play an Empire, Not a Hero
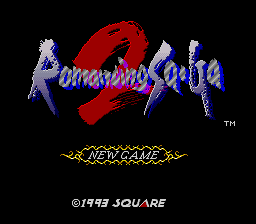
Most RPGs ask you to save the world with one hero. Romancing SaGa 2 asks you to save it with a bloodline: you rule the Empire of Avalon across centuries, handing your accumulated skills, spells and hard lessons from one emperor to the next, until a final ruler confronts the legendary Seven Heroes. It is one of the most original role-playing games of the 16-bit era — and, in its original form, one that never left Japan.
Scope of this article: This guide covers the original Super Famicom release only. The remaster published from 2016 onward (PlayStation Vita, smartphones and current platforms) and the later full remake keep the same foundations — imperial succession, glimmering and formations — but add elements that do not exist in the 1993 cartridge, such as an additional dungeon, additional classes and New Game+ style carry-over features. Where those versions differ, this article does not follow them.
Quick Facts
| Item | Detail |
|---|---|
| Original title | ロマンシング サ・ガ2 (Romancing Sa・Ga 2) |
| English title | Romancing SaGa 2 |
| Platform | Super Famicom (Super Nintendo Entertainment System) |
| Release date (Japan) | December 10, 1993 |
| Developer | Square |
| Publisher | Square |
| Genre | Role-playing game (RPG) |
| Players | 1 |
| Cartridge | 16 Mbit (2 MB) ROM, battery-backed save RAM |
| Original price (Japan) | ¥9,900 |
| Director / Designer | Akitoshi Kawazu |
| Character illustration | Tomomi Kobayashi |
| Music | Kenji Ito |
| Series position | Fifth SaGa game; second Romancing SaGa |
Overview
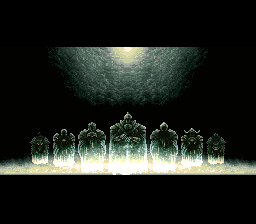
The story opens in the year 1000 with Leon, ruler of Avalon in the land of Varennes, fighting monsters alongside his sons Victor and Gerard. When Victor is killed by Kzinssie — one of the Seven Heroes, ancient saviours who have returned corrupted after a thousand years — Leon learns the secret of inheritance magic from a seer and passes his power to Gerard before dying. From that moment, the game belongs to the dynasty rather than to any individual.
Play alternates between three layers. On the throne, the emperor manages the empire: hearing reports, approving construction in Avalon and funding the development of weapons, armour and spells from the imperial treasury. In the field, a five-person party explores towns and dungeons in a free-scenario structure — you choose which regions to visit and which crises to answer, and Avalon's territory and income grow as regions are annexed. In battle, turn-based combat is shaped by formations, weapon techniques learned through the famous "glimmer" system, and six schools of magic.
There are no experience points. Characters grow through what they actually do in battle: using a weapon raises that weapon skill, casting raises magic levels, and hit points develop along the way. Every character also has Life Points (LP). Losing all HP in battle costs LP; attacks that strike a downed character, and certain enemy techniques, drain it further. A character whose LP reaches zero dies permanently — and if that character is the emperor, the dynasty itself must continue without them.
Why It Still Matters
Romancing SaGa 2 was ahead of its time in ways that are easy to miss today. Its central idea — that the protagonist is an institution, and that death is a transfer of power rather than a failure state — anticipated later dynasty, legacy and roguelite designs by decades. A full party wipe is not necessarily a game over here; it is a succession crisis, and the empire plays on with a new ruler carrying everything the old one learned.
It is also a landmark for the SaGa series itself. The glimmer system debuted in this game: techniques are not bought or granted at level-ups, but sparked in the middle of combat, marked by the now-iconic light bulb. Combined with the free-scenario structure refined from its predecessor, two players' centuries genuinely diverge — different emperors, different annexed regions, different Seven Heroes fought in different orders.
Finally, it remains the best-selling of the three Romancing SaGa titles in Japan, which makes its long absence from Western shelves — the original cartridge was Japan-only, and an official English release arrived only with the remaster era — one of the notable gaps in the Super Famicom library.
Highlights
- You are the empire. Leon and Gerard are only the beginning. Every ruler after them is your choice from the classes you have recruited, and each one inherits the dynasty's accumulated skill and spell levels.
- Death moves the story forward. LP loss, party wipes and the simple passage of years all trigger succession. Only the Final Emperor can give you a true game over.
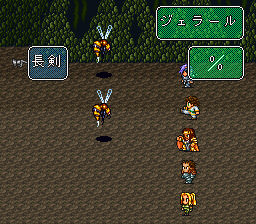
- The glimmer. New techniques flash into existence mid-battle with a light bulb over a character's head — including "evades" that let a character permanently learn to dodge a specific enemy technique.
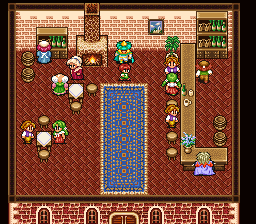
- An empire you can build. The treasury, the Imperial Smithy, the Magic Research Centre, the Imperial University and the Avalon Orchard turn Avalon from a castle town into the engine of your war effort, generation by generation.
Strategy Essentials
This is where Romancing SaGa 2 is won or lost. None of its key systems are explained at length in-game, so the sections below collect the practical knowledge that experienced players pass on.
1. Imperial Succession: How the Dynasty Works
Succession — the transfer of the throne to a new emperor — happens under three conditions:
| Trigger | What happens | Who can succeed |
|---|---|---|
| The emperor's LP reaches 0 | The emperor dies permanently | One of the surviving party members becomes the heir |
| The whole party is defeated | The reign ends in catastrophe | You choose from four candidates drawn from the classes available to the empire |
| A long span of years passes (an "era jump" after major events) | The reign ends with the passage of time | You choose from four candidates, as above |
What the new emperor inherits:
- Skill and spell levels. The incoming ruler takes over the dynasty's accumulated weapon-skill and magic levels where the predecessor's are higher — this is why emperors grow more versatile with every generation, layering each new class's own aptitudes on top of everything learned before.
- Techniques and spells known to the empire. Techniques glimmered in earlier generations are registered at the training dojo in Avalon Castle and can be taught to new party members; spells are managed through the Magic Research Centre (see below).
- HP, technique points and spell points carry over where the predecessor's values exceed the heir's own.
- Equipment does not stay on the body — the previous emperor's gear is returned to the castle storeroom, so remember to re-equip after every succession.
Two practical consequences follow. First, succession is a resource, not a punishment: deliberately cycling through emperors of different classes is how you collect new formations (Section 3) and broaden the imperial skill base. Second, the era jump is irreversible. When it fires, the entire party is replaced, some pending quests close, and opportunities tied to a particular emperor — a specific gender or class, for example — may not come back in the same form.
Leon (fixed) ──► Gerard (fixed) ──► your choice of heir ──► your choice ──► ...
                                        │                        │
                          inherits skills, spells,        era jumps close some
                          dojo-registered techniques      quests for good
                                        │
              after five of the Seven Heroes are defeated and the
              next succession occurs ──► THE FINAL EMPEROR
The Final Emperor. The last ruler's identity — male or female, and their name — is chosen by you at the very start of the game, long before they appear. The Final Emperor takes the throne once five of the Seven Heroes have been defeated and the next succession occurs. From that point there is no more inheritance magic and no more era jumps: if the Final Emperor's LP reaches zero, the game is truly over. Everything you still want to collect — formations, classes, developed equipment, researched spells — must be in place before that threshold, which is why experienced players keep the count of defeated Heroes at four while they finish their preparations.
2. Era Jumps and the Seven Heroes
Era jumps are driven by progress, not by a visible clock. Japanese strategy research on the original game commonly describes the underlying rule in terms of hidden "event points" awarded for completing story events (events that end with an on-screen caption): a reign whose accumulated total reaches 15 points is guaranteed to jump, a total of 7 or fewer never jumps, and totals of 8–14 may or may not jump depending on how many battles the current emperor has fought. Defeating one of the Seven Heroes is worth a large share of points, so Hero hunts are the most common trigger. Treat the exact arithmetic as a rule of thumb rather than a promise — but plan around its clear implication: you cannot always choose when a generation ends, so finish time-sensitive business in a region before you hunt its Hero.
The Seven Heroes — Kzinssie, Subier, Dantarg, Noel, Bokhohn, Rocbouquet and Wagnas — are not static bosses waiting at fixed strength:
- The world grows stronger as you do. Enemy strength rises gradually with the number of battles you win and as the story advances, so grinding is never free: every victory also arms the opposition.
- Individual Heroes change with the ages. Dantarg is the clearest case: left alone across generations, he absorbs the bosses of his region's dungeons and evolves into stronger forms — waiting is a trade-off, not a free delay. Subier's strength likewise depends on how you resolve the oceanic events connected to him, including whether the master of the sea is fought or appeased.
- The order is yours — with one exception. Kzinssie's first defeat is scripted into the Leon/Gerard prologue. After that, the remaining Heroes can be challenged in an order shaped by which regions you annex and when.
A widely shared way of thinking about the order, rather than a fixed answer: deal earlier with Heroes whose tricks become oppressive at higher enemy strength — Bokhohn, whose Marionette technique turns your own party members against you, is the usual example — and use the breathing room to secure formations, evades against signature techniques such as Kzinssie's returning Soulsteal and Rocbouquet's Temptation, and developed equipment. Rocbouquet also interacts with the emperor's gender, which is one more reason succession planning matters. Above all, remember the Final Emperor rule: the fifth Hero you defeat starts the endgame clock, so leave that kill until your empire is ready.
3. Formations: The Emperor's Class Is the Key
A formation arranges your five party members, adjusting who the enemy targets, who is protected, and in some cases the order in which everyone acts. Formations only hold while all five members are standing: if anyone falls, the formation breaks and the party reverts to Free Fight. Being caught from behind or dashing into an enemy can also cost you the formation at the start of a fight.
New formations are developed at the training grounds in Avalon Castle: seat an emperor of a class you have never brought there before, and talk to the soldier researching formations. One new class on the throne is worth one new formation, which then stays available for the rest of the game. The original cartridge contains fifteen formations in total; the table below covers the ones that anchor most playthroughs.
| Formation | Learned from an emperor of… | Effect and best use |
|---|---|---|
| Free Fight (Free For All) | Available from the start | No bonuses and no fixed positions; also the state you fall back to when a formation breaks. The baseline everything else is measured against. |
| Imperial Cross | Available from the start | The traditional imperial formation. Attacks concentrate on the front-centre position, whose defence is raised; the back line is sheltered. Put your sturdiest character in the middle and learn the game in it. |
| Imperial Arrow | Imperial Guard | Spreads enemy attention more evenly than the Cross and suits parties built around bows and ranged techniques. A steadier mid-game default than it first appears. |
| Free Fight -1 | City Thief | A reworked Free Fight: the front line's speed rises and one member at the back is kept out of harm's way. Good for fast, aggressive parties in ordinary encounters. |
| Amazon Strike | Amazon | An offence-leaning formation from an Amazon empress, favouring hard-hitting physical line-ups that want to end fights quickly. |
| Hunter's Shift / Whirlwind / Desert Fox / Lightning Flash / Power Raise | Hunter / Nomad / Desert Guard / Saigo clansman / Court Mage (see note) | The remaining class formations of the original set: respectively a ranged-hunter arrangement, a sweeping wind formation, a desert-fighter arrangement, a fixed-order formation that empowers the last member to act, and a magic-supporting arrangement. Each rewards building a party around its theme rather than treating it as a universal upgrade. |
| Holy Wall (Divine Wall) | Holy Order | Built to shield the back row so that casters can work in safety behind a guarded front. The defensive counterpart to the offence-first options. |
| Mu Fence (Mu Rampart) | Mole | The whole party always acts last, in exchange for strengthened defence. A deliberate, counter-punching formation for parties that can absorb a first blow. |
| Dragon Stance | Martial Artist | Fixes the action order from the front of the formation to the back, so your party acts in one planned sequence — devastating when the lead character is faster than the enemy, because the whole chain can land before the enemy answers. |
| Rapid Stream | Corsair (Armed Merchant fleet) | The whole party always acts first, at the cost of a fragile defence and shields that rarely come into play. The single most sought-after formation of the original game: whole parties are built around winning the first turn. |
| Rising Phoenix | Strategist | Concentrates enemy attacks on the central character while raising the whole party's shield activation; in exchange, the party's speed suffers. The boss-fight fortress — park your toughest defender in the middle. |
References differ on the exact effects of some formations.
Two habits make formations pay off. First, every time a new class joins the empire, consider giving it one reign — even a short one banks a formation forever. Second, match the formation to the job: Rapid Stream or Dragon Stance to sweep ordinary encounters before they can hurt you, Rising Phoenix or Imperial Cross to survive bosses, Mu Fence when acting last is itself the plan (for example, to heal after the enemy has committed).
4. Glimmering: Techniques and Spells
Techniques (techs). There are no shops selling skills. In battle, using a weapon attack can trigger a glimmer — the light-bulb moment — and the character learns a new technique on the spot and uses it immediately. The system underneath has four moving parts:
| Factor | What it means for you |
|---|---|
| Spark type | Every character belongs to one of sixteen hidden glimmer types, which define which techniques they can ever spark. Two characters of the same class can have different types — a favourite who "just won't learn it" is usually a type mismatch, not bad luck. |
| The move you used | Most techniques can be sparked from a basic attack with the right weapon, but some must be sparked from a specific earlier technique, and a few are tied to specific weapons. Tech trees are chains, not lists. |
| Spark difficulty | Each technique has a hidden difficulty. Easy techniques appear against weak enemies; the great ones need worthy opposition. |
| The enemy's level | Stronger enemies have a higher technique level, which is what makes high-difficulty sparks possible at all. Sparking against the weakest slimes in the game has a hard ceiling. |
Practical rules that follow: fight enemies at or above your level when hunting techniques; rotate weapons across the party so different spark types cover different trees; and remember the eight-slot limit — a character can hold only eight techniques at a time, so old techniques must be forgotten to make room, which is a real (if reversible, via the dojo) commitment. Everything sparked is registered at the dojo after the next era jump or Hero defeat and can then be taught to other characters, which is how a dynasty turns one lucky light bulb into standard imperial training. Evades work the same way in reverse: surviving an enemy technique can spark the ability to dodge it automatically thereafter, and banking evades against boss signatures (Soulsteal, Temptation and their kin) is one of the highest-value preparations in the game.
Spells. Magic comes in six schools: Fire, Water, Earth, Wind, Light and Dark. They are arranged in opposed pairs — Fire against Water, Earth against Wind, Light against Dark — and a single character cannot hold spells from both sides of a pair at once; taking up one side means giving up the other until it is forgotten at the research centre. Spells are not sparked in battle like techniques. Once the Magic Research Centre exists, characters can be taught spells there, and the empire's global level in each school — raised by actually casting that school's magic in battle across the whole party — determines what can be taught.
Fusion spells are the research centre's long game. A fusion combines two schools (for example, Water and Earth for the great healing spell Elixir, or Fire and Light for area damage). Here’s how to develop a fusion spell:
raise the GLOBAL levels of two schools in battle
            │
            ▼
visit the researcher for that pair at the Magic Research Centre
and fund the project from the treasury
            │
            ▼
the spell is completed in the NEXT generation
            │
            ▼
teach it at the centre to any character whose levels qualify
Funding fusion research early is therefore a gift to your own successors — one of the purest expressions of the game's design. Two schools need extra groundwork: Light magic's laboratory becomes available through the Imperial University and its Strategist connection, and Dark magic hangs on a notorious late-game choice around the volcano on Comroon Island, where saving the Salamanders and pursuing the dark grimoire cannot both be had in the same history. Decide which your dynasty wants before the mountain decides for you.
5. Treasury, Construction and Developing Avalon
Annexing regions does more than open the map: each territory feeds the imperial treasury, and the income that flows in after battles is what pays for everything in this section. Development is ordered from the throne and paid from the treasury, and projects complete as battles and time pass — ordering something and then adventuring is the normal rhythm.
| Project | Role | Priority thinking |
|---|---|---|
| Imperial Smithy | Develops new weapons and armour, which then become standard issue. The single most direct conversion of money into battlefield strength. | Fund steadily from early on. Developed equipment is the dynasty's permanent inheritance — it never has to be re-earned after a succession. |
| Magic Research Centre | Lets any character learn spells, manages the opposed-school rules, and hosts fusion-spell research. Guides put its construction cost at 1,000,000 crowns, and the offer to build it appears once the emperor's spell points (maximum MP) reach 25. | Build it as early as you can afford. Almost everything in Section 4 depends on it, and fusion projects need a generation to mature, so delay is doubly expensive. Raise a casting emperor's MP deliberately if the offer has not appeared. |
| Avalon Orchard | A planted garden in Avalon that grows as you fight and steadily increases imperial income (listed in guides at 300,000 crowns to establish). | An investment, not a weapon: the earlier it is planted, the more battles it compounds across. Buy it when the treasury can spare the sum without stalling the Smithy or the research centre. |
| Imperial University | The empire's school for talented subjects. Unlocks the Strategist line of play, opens the way to the Light-magic laboratory, and offers examinations with rewards. Commonly described as becoming available once the empire has grown to around five annexed regions. | Build it in the mid-game, before you need its graduates. The Strategist alone — source of the Rising Phoenix formation — justifies the cost for boss-heavy routes. |
The order that emerges is simple to state and hard to fund: Smithy for today, Research Centre for tomorrow, Orchard for the day after, University for the endgame — while keeping a reserve, because a rich treasury is also what lets you say yes to the unexpected (a bridge, a bribe, a researcher's sudden request) without selling your future.
6. Where Players Get Stuck
- The Canal Fortress (early game). Gerard's first real campaign blocks the canal south of Avalon, and a frontal assault on the gate is deliberately punishing. The fortress has quieter doors: the Thieves' Guild in Avalon — found by following the rooftop thief at night and clearing the sewers for the guild — will sneak you inside past most of the garrison. A third route, paying a suspicious informant for a boat, exists and is exactly as trustworthy as it sounds. If the gate fight is crushing you, that is the game telling you to go home and make friends first.
- Era jumps closing doors. Because jumps are triggered by progress, a Hero hunt can end a reign — and a quest line — mid-preparation. Before setting out against a Hero, finish anything in progress that depends on the current emperor: class-specific audiences, gender-specific events, and half-built storylines. What a generation leaves unfinished, the next generation may find simply gone.
- The Comroon Island fork. The choice between the Salamanders and Dark magic (Section 4) is permanent for that playthrough. Neither answer is wrong, but choosing by accident is: know which prize your party composition wants.
- The fifth Hero. Defeating a fifth Hero does not end the game, but it starts the Final Emperor's reign at the next succession — after which there are no more jumps, no more new formations from new emperors, and no safety net. Count your victories. Four is a strategy; five is a commitment.
- Late Heroes at high enemy strength. Because the world scales with your victories, a Hero left until very late can be far more dangerous than the same Hero met earlier — Dantarg's evolving forms are the extreme case. "I will deal with them later" is a decision with a price tag; re-price it every generation.
Who It's For
Romancing SaGa 2 suits players who enjoy systems more than scripts: builders who like watching a capital grow, tacticians who enjoy formations and turn-order puzzles, and series veterans curious about where glimmering and free-scenario design came from. It asks for patience with 1993 conventions — opaque rules, real failure states, progress that can close doors — and it rewards note-taking. If a single handcrafted hero's journey is what you want, this is not that game; if the idea of being the dynasty appeals, there is still nothing quite like it.
How to Play It Today
The original cartridge was a Japan-only Super Famicom release, so the authentic route is an original Japanese cartridge on Super Famicom (or compatible) hardware — copies circulate widely on the Japanese second-hand market.
- Original Super Famicom cartridge (Japan, 1993):
For readers who want official modern editions, be aware of what you are getting: the remaster (2016 onward, on smartphones, PlayStation Vita and current platforms) is the closest official relative of the cartridge and was the game's first official English release, but it adds content such as an extra dungeon and carry-over features that this article deliberately excludes; the 2024 full remake rebuilds the game in 3D with further system changes. The Super Famicom original was also re-released in Japan on Nintendo's Virtual Console services for Wii, Wii U and New Nintendo 3DS while those stores operated. Whichever route you choose, the succession, glimmer and formation fundamentals in the Strategy Essentials above will serve you — but check version-specific details against a guide for your edition.
Find the original Japanese cartridge
Disclosure: The Rakuten and Yahoo! Shopping links are standard shopping links. Enkeisha does not earn a commission from purchases made through these links.
Find original hardware editions on eBay
As an eBay Partner Network affiliate, Enkeisha may earn a commission from qualifying purchases made through these links.
Search eBay listings (affiliate link)
Check the language, region, hardware compatibility, condition and authenticity before buying. Search results may include reproductions; links do not endorse individual sellers.