Rockman X3 (Mega Man X3): Zero Joins the Hunt — Weakness Order, Every Upgrade, and the Two Endgame Secrets
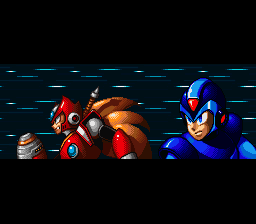
The last X game on the Super Famicom is also the most secret-stuffed: a playable Zero who can be lost forever, four Ride Armors, a one-of-four enhancement chip you may want to refuse, and a golden armour and a borrowed saber that both demand very specific play. This guide covers the Super Famicom original only — the animated sequences and arranged music of the later PlayStation and Saturn ports are not part of the original game's specification and are not treated as such here.
| Quick facts | |
|---|---|
| Japanese title | ロックマンX3 (Rockman X3) |
| Western title | Mega Man X3 |
| Platform | Super Famicom / Super NES |
| Release | December 1, 1995 (Japan) |
| Developer | Minakuchi Engineering / Capcom |
| Publisher | Capcom |
| Genre | Action platformer |
| Cartridge | 16-megabit, LoROM, with Capcom Cx4 chip |
Overview
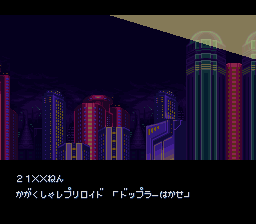
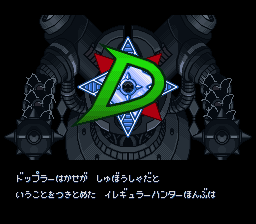
Dr. Doppler, a Reploid scientist, claims to have neutralised the Sigma Virus and gathers the cured Reploids in Dopple Town. When the town's forces turn Maverick anyway, X and Zero — now a Special Unit commander — move in. Behind Doppler stands both the Nightmare Police duo, Bit and Byte, and, inevitably, Sigma himself.
The skeleton is the familiar one: an opening stage, eight freely selectable Maverick stages, then Dr. Doppler's fortress. Almost everything around that skeleton is new or expanded. Zero is playable for the first time in the series, callable mid-stage under strict limits. Four different Ride Armors wait to be unlocked and then summoned from platforms across the stages. Alongside the four standard armour parts sit four pink enhancement-chip capsules, of which X can normally equip only one. Bit and Byte begin ambushing you in stage mid-boss rooms after you have defeated two Mavericks, and the returning Vile (VAVA in Japan) hides in a secret factory stage of his own, reachable from teleport hatches in three of the eight stages. Progress is still kept with passwords, and the cartridge's Cx4 chip — also used in Rockman X2 — handles wireframe and rotation effects that the base hardware could not do alone.
Why It Still Matters
Rockman X3 closed the X series' Super Famicom trilogy, and it is the entry that turned "find the hidden upgrades" into the whole game. In Rockman X the capsules and tanks were a rewarding layer; here they are a routing puzzle with teeth, because two of the best rewards in the game — the Gold Armor and Zero's Beam Saber — are locked behind how you played the previous ten hours, not just whether you explored. It is also a historical hinge: Zero's limited, high-risk debut as a playable character is the direct prototype for his full co-lead role from X4 onward, and the game makes his fragility part of the story, with the ending itself changing depending on whether he is still standing. Few 16-bit action games ask you to protect a second hero as a long-term strategic resource.
Highlights
- Zero, playable — with stakes. He hits harder than early-game X and starts with a longer life gauge, but he can be called only once per stage attempt, cannot use special weapons or Sub Tanks, is turned back at boss and most sub-boss gates, and is lost for the rest of the game if his life gauge ever empties (see the Zero section below).
- Four Ride Armors, four jobs. The balanced Chimera, the melee Kangaroo, the flying Hawk and the underwater Frog are persistent unlocks, not one-stage props — once claimed, each can be summoned at Ride Armor platforms in most stages.
- A chip you might refuse. Each pink capsule offers a powerful enhancement, but X can equip only one of the four — and taking any one of them permanently closes the door on the Gold Armor.
- Stages that answer each other. Defeating Blast Hornet first is what makes Gravity Beetle's Heart Tank reachable, and defeating Gravity Beetle calms a set-piece in Blast Hornet's stage — order matters for collection, not just for bosses.
Strategy Essentials
The eight Mavericks: weakness chain and recommended order
Every boss hands over a weapon, and every weapon is another boss's weakness. The eight form a single closed loop. The recommended order below simply follows the loop, starting with Blizzard Buffalo, who is entirely manageable with the X-Buster and whose stage gives you the Foot Parts on the same visit.
| # | Boss | Weapon you earn | Weakness | Notes |
|---|---|---|---|---|
| 1 | Blizzard Buffalo | Frost Shield | Parasitic Bomb | Start here with the X-Buster; wall-kick and dash over his charges. His stage holds the Foot Parts |
| 2 | Toxic Seahorse | Acid Burst | Frost Shield | Frost Shield stops his leaping pattern cold |
| 3 | Tunnel Rhino | Tornado Fang | Acid Burst | Keep the acid flowing; he charges almost constantly |
| 4 | Volt Catfish | Triad Thunder | Tornado Fang | The drill interrupts his electrical attacks |
| 5 | Crush Crawfish | Spinning Blade | Triad Thunder | Mind the claws at close range; Triad Thunder ends it quickly |
| 6 | Neon Tiger | Ray Splasher | Spinning Blade | Blades track a boss who climbs and dives |
| 7 | Gravity Beetle | Gravity Well | Ray Splasher | Beat Blast Hornet before a collection revisit (see Heart Tanks) |
| 8 | Blast Hornet | Parasitic Bomb | Gravity Well | Gravity Well pins a boss who would otherwise fill the screen with hornets |
The weakness loop (text diagram)
Parasitic Bomb ──▶ Blizzard Buffalo ──▶ Frost Shield ──▶ Toxic Seahorse ──▶
Acid Burst ──▶ Tunnel Rhino ──▶ Tornado Fang ──▶ Volt Catfish ──▶
Triad Thunder ──▶ Crush Crawfish ──▶ Spinning Blade ──▶ Neon Tiger ──▶
Ray Splasher ──▶ Gravity Beetle ──▶ Gravity Well ──▶ Blast Hornet ──▶
Parasitic Bomb ──▶ (and the loop closes)
Read each step as: weapon beats boss, earning the next weapon. Two warnings about pure loop order. First, collection is not loop-shaped: several capsules and tanks need weapons from late in the loop (the Head Parts want Triad Thunder, the Chimera wants Tornado Fang), so expect planned revisits rather than one clean sweep. Second, from your third stage onward, Bit or Byte may be waiting in the mid-boss room. Bit is generally the faster, ring-throwing fight and Byte the heavier one; both retreat or fall and their status carries into the fortress, where whether you destroyed them changes a later encounter.
Heart Tanks (Life Ups) — 8, one per stage
Each Heart Tank permanently extends X's life gauge. One sits in every Maverick stage.
| Stage | Location | Requirement / how to get it |
|---|---|---|
| Blizzard Buffalo | Pit beneath the large ice blocks, just past the Ride Armor platform early in the stage | Break the ice blocks with a Ride Armor (Chimera or Kangaroo); Tornado Fang can also break them. Drop to the bottom of the pit |
| Toxic Seahorse | Small ledge at the top of the first toxic waterfall | Climb the waterfall instead of taking the right-hand exit at its base |
| Tunnel Rhino | Platform behind a boulder, at the right branch near the top of a vertical shaft | Go right at the branch and use a charged Triad Thunder to knock the boulder down |
| Volt Catfish | On a bed of spikes at the very top of the second elevator shaft | Ride the elevator past the usual exit to the top; jump across and slide down the far wall to grab it without touching the spike floor |
| Crush Crawfish | Hidden room below a breakable floor section | Bring a Ride Armor and smash through the floor; the tank is in the room below |
| Neon Tiger | Ledge above the boss gate, at the very end of the stage | Ride the final platform insect up, or dash-jump from the higher step and wall-climb to the ledge |
| Gravity Beetle | Platform in the top-left corner of the large room inside the main building | Defeat Blast Hornet first — only then is this tank reachable. Revisit if you came here earlier |
| Blast Hornet | Top of the right-hand wall, outside near the Chimera area, after the airship box sequence | Use the Foot Parts' upward air dash to reach the wall, then climb to the top |
Sub Tanks — 4
Sub Tanks store life energy picked up while your gauge is full, and can be drained at any time to refill it. Unlike the classic series' E-Tanks they are permanent and refillable. Fill all four before the fortress.
| Stage | Location | Requirement / how to get it |
|---|---|---|
| Neon Tiger | Far top-right corner near the start, above the open area with the rideable insects | Climb the right wall, destroy the mace-swinging enemy, and use a platform insect (or an upward air dash) to reach the corner |
| Blizzard Buffalo | Ledge in plain sight above the ladder into the final open area before the boss | Requires the Foot Parts found in this same stage: upward air dash from the raised step to the ledge |
| Tunnel Rhino | Far-right corner of the dirt-column tunnel section | As the stepped platforms drop, jump to the right wall and climb to it |
| Volt Catfish | Hidden room below the long vertical passage beyond the Bit/Byte room | Take a Ride Armor from the platform at the top, return to the passage and drop: the armour's weight cracks the floor into the hidden room |
Armour parts (blue capsules) — 4
Dr. Light's standard upgrades. The Head Parts also add the series' most useful quality-of-life feature here: the stage-select screen then shows which items each stage still holds.
| Part | Stage | Effect | Requirement / how to get it |
|---|---|---|---|
| Foot Parts | Blizzard Buffalo | Variable Air Dash: air dash horizontally or straight up | No requirement. At the end of the snowy open area, dash-jump from the last platform to the small ledge and wall-kick up to the capsule |
| Arm Parts | Neon Tiger | Second X-Buster with up to four charge levels and a Cross Charge Shot; also allows charging special weapons | Requires Tornado Fang and the Foot Parts. Drill through the cracked wall before the long ladder drop, then dash-jump across the pit |
| Head Parts | Tunnel Rhino | Stage-select item radar: shows the locations of uncollected items per stage | Requires the Arm Parts and Triad Thunder. Use a charged Triad Thunder to drop the hanging boulder above the spike pit and open the path |
| Body Parts | Volt Catfish | Halves damage taken and briefly raises a defensive shield after a hit | Requires the Arm Parts and Gravity Well. Ride the last elevator to the top and fire a charged Gravity Well under the green platform to lift it — and you — to the capsule |
Enhancement chips (pink capsules) — choose at most one
Each pink capsule enhances one part further. The catch defines an entire playthrough: X can equip only one of the four chips, and taking any one of them disqualifies him from the Gold Armor below. Unless you are deliberately building around a single chip, the standard advice is to note their locations and walk past all four.
| Chip | Stage | Effect | Requirement / how to get it |
|---|---|---|---|
| Foot Chip | Toxic Seahorse | Air dash twice in a single jump | Requires the Foot Parts. Take the Frog Ride Armor along the upper route before the underwater section, destroy the fans, and climb to the dry area beyond |
| Body Chip | Crush Crawfish | Further reduces damage and lengthens the defensive shield | Requires a Ride Armor to reach the capsule area |
| Head Chip | Blast Hornet | Standing still slowly restores X's life — and also refills his Sub Tanks | Requires the Hawk Ride Armor: summon it at the stage's platform, dash-jump from the ledge and hover across to the small capsule room |
| Arm Chip | Gravity Beetle | Hyper Charge: rapid-fire charged shots without holding the button | Requires a Ride Armor; break through the crates in the upper route with it |
Ride Armors — 4 types
Claim the Chimera first: it is the key that activates every Ride Armor platform in the game. The other three can be claimed in any order once their requirements are met, but none can be summoned until the Chimera is yours.
| Type | Found in | Requirement / how to get it | Best used for |
|---|---|---|---|
| Chimera (N) | Blast Hornet | Requires Tornado Fang. In the hangar area, drill through the crates and then the right-hand wall to drop into the hidden dock where it is held | The balanced all-rounder: strong punches and a dash. Your default summon, and the tool for breaking heavy blocks and floors |
| Kangaroo (K) | Toxic Seahorse | Requires the Foot Parts, plus one of two routes: ride the Frog Armor along the upper path past the fans, or float up on a charged Frost Shield ice block with the Arm Parts | Close combat: bladed punches in place of fists. Plays like a more aggressive Chimera |
| Hawk (H) | Crush Crawfish | Requires the Arm Parts and Triad Thunder. Fire a charged Triad Thunder into the collapsible floor early in the stage and drop through | Flight: brief hovering flight and missile shots. Reaches high capsules — including the Head Chip — that nothing else can |
| Frog (F) | Gravity Beetle | Requires the Foot Parts. After the Bit/Byte room, climb out, scale the column and use an upward air dash to the ledge | Underwater work: the only Ride Armor that functions underwater, firing torpedoes. Also the key to the Foot Chip and one Kangaroo route |
Playing as Zero — rules, risks, and the fork
Zero is called from the weapon-select screen (the Zero Change function). Call him in with care, because the rules are unusually strict for a co-hero:
| Rule | Detail |
|---|---|
| How to call him | Open the weapon-select screen mid-stage and switch to Zero. He can be called once per stage attempt; switching back to X spends the call for that stage |
| Where he can go | Ordinary stage areas only. He is automatically switched back to X at boss gates and almost all sub-boss gates, so he effectively covers part of a stage at a time |
| What he has | His own, initially longer life gauge; the Zero Buster with two charge levels; and the Beam Saber as his maximum-charge attack |
| What he lacks | No special weapons, no Sub Tanks, no armour or chip upgrades — those are X's systems |
| If his gauge empties | He is gone for the rest of that playthrough. No 1-Up restores him, and the story continues without him |
| The ending fork | If Zero survives to the end, he delivers the finishing move against Sigma with Dr. Doppler's anti-virus loaded into his saber. If Zero was lost earlier, Dr. Doppler himself intervenes instead, at the cost of his own life |
The one exception to the "no bosses" rule is the point of the next section. Treat Zero as a precious spare life gauge for dangerous corridors — never as a free one, because every point of damage he takes is a permanent strategic cost.
Secret 1: Zero's Beam Saber for X (the Z-Saber)
X can inherit Zero's Beam Saber — swung as part of his own maximum charge, and devastating against the fortress bosses — but only on a very specific run:
- Use the teleport hatch in Blizzard Buffalo, Volt Catfish or Crush Crawfish’s stage to reach the hidden factory. Bring Ray Splasher and defeat Vile there before entering the Doppler stages. If Vile survives, you will fight him again in Doppler Stage 2.
- Keep Zero intact. Zero must never have been defeated before the event described below.
- In Doppler Stage 2, hand a specific door to Zero. Partway through the stage is a sub-boss door — the one leading to the Mosquitus, a large insect — that Zero, uniquely, is allowed to enter. Switch to Zero before entering, and let him destroy the Mosquitus.
- Accept the trade. The falling Mosquitus wrecks Zero's power unit. X warps in, and the wounded Zero hands him the Beam Saber before leaving. From that point Zero is unavailable, exactly as if he had fallen — the saber is the fork in the road, not a bonus on top of keeping him.
Secret 2: the Gold Armor (Hyper Chip)
The pink capsule in Doppler Stage 1 holds the Hyper Chip, which grants all four enhancement-chip effects at once and turns X's armour gold. It is the strictest secret in the game:
| Condition | Why |
|---|---|
| Defeat all 8 Mavericks | Baseline fortress access |
| Collect all 8 Heart Tanks and all 4 Sub Tanks | Full collection is genuinely required here |
| Collect all 4 armour parts (blue capsules) | The Hyper Chip enhances a complete armour |
| Claim all 4 Ride Armors | Part of the same full-collection requirement |
| Take none of the four pink enhancement chips | Taking even one chip removes the Hyper Chip capsule. This is the trap: the game offers you four tempting capsules you must refuse |
| Reach the hidden room with a completely full life gauge | The capsule only yields the chip to a full-health X. Top up — or arrive in a Ride Armor — before the drop |
Where: in Doppler Stage 1, at the pit where spiked balls rain down, slide down the left wall instead of dropping through the middle. A hidden passage in the wall leads to the capsule room. If the capsule is not there, re-check the list above — a single collected chip is the usual culprit.
Note the deliberate design tension between the two secrets: the Gold Armor wants a perfect, untouched-chip collection run, while the Beam Saber wants a run in which you hunted Vile early and kept Zero safe. They are compatible — a careful player can earn both in one playthrough — but each punishes a different kind of carelessness.
Doppler's fortress: the short version
| Encounter | Weakness / notes |
|---|---|
| Doppler Stage 1 — Press Disposer | Ray Splasher. The Gold Armor capsule is hidden in this stage (see above) |
| Doppler Stage 2 — Mosquitus / Vile rematch | If Vile fell in his factory, this stage holds the flooded Mosquitus route and the Beam Saber event. If not, Vile waits here himself |
| Doppler Stage 3 — boss refights, then Godkarmachine or its parts | All eight Mavericks return with their original weaknesses. Whether Bit and Byte were both destroyed decides whether you face their combined machine |
| Doppler Stage 4 — Dr. Doppler | Acid Burst. Stay mobile; his forms change with his remaining health |
| Sigma, first form | Spinning Blade |
| Kaiser Sigma, final form | The Beam Saber, if you earned it, is the reliable answer; otherwise charged X-Buster shots to the head, from the platforms, with all four Sub Tanks in reserve |
Who It's For
- X and X2 veterans ready for the trilogy's hardest, most collectible-dense chapter.
- Completionists who enjoy secrets with conditions — a game where refusing an upgrade is itself a strategy.
- Zero fans who want to see where playable Zero began — and to feel why keeping him alive used to mean something.
How to Play It Today
- Mega Man X Legacy Collection (Switch, PS4, Xbox One, PC) — the modern standard; includes Mega Man X through Mega Man X4 in its first collection.
- Original Super Famicom cartridge — the Japanese original on real hardware, Cx4 wireframe effects intact. The North American SNES cartridge had a limited original run and is notably harder to find.
Find the original Japanese cartridge
Disclosure: The Rakuten and Yahoo! Shopping links are standard shopping links. Enkeisha does not earn a commission from purchases made through these links.
Find original hardware editions on eBay
As an eBay Partner Network affiliate, Enkeisha may earn a commission from qualifying purchases made through these links.
Search eBay listings (affiliate link)
Check the language, region, hardware compatibility, condition and authenticity before buying. Search results may include reproductions; links do not endorse individual sellers.