Mega Man 7 (Rockman 7) — The Deep Guide: Weakness Loops, the Super Adapter, and Every Hidden Part
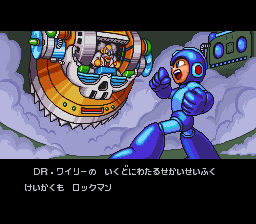
Mega Man 7 is the classic series' one trip to 16-bit — bigger sprites, a heavier feel, and a structure that quietly rewrites the formula. The eight Robot Masters arrive in two waves of four, a shop turns loose bolts into insurance, and the stages hide a second game underneath the first: plates, a bird, a shield, and parts you are never told about. This is a deep guide, not a skim: play it in the order below and you will know exactly which weapons hurt, which weapons heal, and what is waiting at the end.
Quick Facts
| Item | Detail |
|---|---|
| Japanese title | Rockman 7: Shukumei no Taiketsu! (ロックマン7 宿命の対決!, "Showdown of Destiny!") |
| English title | Mega Man 7 (stylised Mega Man VII) |
| Platform | Super Famicom / Super Nintendo Entertainment System |
| Release | Japan: March 24, 1995 · North America: September 1995 · Europe: 1995 |
| Developer / Publisher | Capcom / Capcom |
| Genre | Action-platformer (run-and-gun) |
| Series position | 7th entry in the original Mega Man series; direct sequel to Mega Man 6; the only numbered classic-series entry on the SNES |
| Cartridge | 16 Mbit (2,097,152 bytes), LoROM FastROM, ROM-only cartridge — progress is kept by password, not by battery save |
| Players | 1 player (plus a hidden 2-player Versus Mode — see Secrets) |
| Notable debuts | Bass (Forte in Japan) and Treble (Gospel in Japan); Auto (Rightot in Japan) and the bolt shop |
A note on names before the tables begin: this guide uses the English weapon names throughout, with the Japanese names alongside in the main weakness table. The two sets describe the same weapons. Thunder Bolt is Thunder Strike in Japan, and Scorch Wheel is Burning Wheel — if you are playing the Japanese cartridge, match by the boss who dropped the weapon, not by the name.
Overview
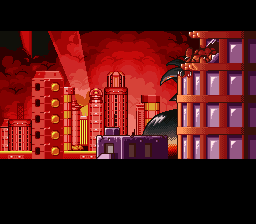
The story picks up six months after Mega Man 6. Dr. Wily is in prison — and then, exactly as he planned, four Robot Masters he built in secret wake up, break him out, and the chase begins again. On the way, Mega Man meets Bass, a black-and-gold robot who claims to be fighting Wily too, alongside his wolf Treble. Bass steals every scene he is in and — to keep the spoiler to the minimum the boss tables require — is not what he first appears to be.
The campaign is 14 stages long, and its shape matters more than its length:
| Block | Stages | What happens |
|---|---|---|
| Opening stage | 1 | A ruined city, a first meeting with Bass, and the Mad Grinder mid-boss |
| First wave | 4 Robot Master stages, in any order | Freeze Man, Junk Man, Burst Man, Cloud Man |
| Middle stage | 1 (Robot Museum) | A short stage and the Mash mid-boss; clearing the first wave unlocks it, and clearing it unlocks the second wave |
| Second wave | 4 Robot Master stages, in any order | Spring Man, Slash Man, Shade Man, Turbo Man |
| Wily Castle | 4 stages | Includes Bass fights, a Guts Man homage boss, the eight-boss rematch, Wily Machine 7, and the Wily Capsule |
Underneath that structure sit the systems that make 7 play differently from the NES games:
- The shop. Enemies and stages drop Bolts (Screws). Press Select on the stage-select screen to visit Big Eddie, where Auto builds tanks, parts, and upgrades. Nothing in the shop is strictly required — everything except convenience items is also hidden in stages — but the shop converts spare time into safety.
- Rush Search. Rush becomes a bloodhound: he digs up supplies almost anywhere, barks near secrets, and is the key to several one-of-a-kind parts.
- Hidden parts as the real progression. The Super Adapter, Beat, the Proto Shield, the Exit unit, and the Energy Balancer are all optional, all hidden, and all change how the second half — especially the Wily Castle — feels.
- Password, classic-style. There are no Heart Tanks, no Sub Tanks, and no armour capsules here — that is the Mega Man X system, not this game's. Health never grows; what grows is your tank stock (at most four Energy Tanks, four Weapon Tanks, one Super Tank), your weapon set, and your knowledge of the loops below.
Why It Still Matters
Mega Man 7 was developed in a famously short window — the creators have described a development period of about three months — and released in the SNES's twilight, when the industry's attention was already moving to 32-bit machines. Judged as a design document rather than a showcase, it is anything but a footnote.
This is where the classic series absorbed the lessons of its spin-offs and Game Boy cousins: a currency and shop system (from the Game Boy titles' P-Chips), weapon switching on the shoulder buttons without opening a menu (echoing X), bosses that visibly react when hit by their weakness, and stages built to be revisited with new tools. The bolt shop and the hidden-part hunt became series standards from here on. It also introduced Bass, who went on to co-headline his own game, and it ends with one of the most debated final bosses in the franchise — a Wily Capsule so demanding that beating it cleanly is still a small rite of passage. The two-wave structure and the sheer number of optional pickups also make a guided second run a different — and much richer — game than a blind first run.
Highlights
- Bosses that react. Hit a Robot Master with its weakness and it freezes, tangles, stalls, or falls out of its pattern. Hit one with the wrong special weapon, though, and several bosses are healed or powered up instead (the trap table in §3 is not optional reading).
- The Robot Museum. A one-stage love letter: past Robot Masters in glass cases, a theft in progress, and a boss built from a beloved silhouette.
- Shade Man's castle. A horror-themed stage whose pumpkin mid-boss can be beaten two different ways — each opening a different route with different treasure — plus a hidden music trick (see Secrets).
- The Super Adapter. Mega Man 6 gave Rush two separate armours. 7 merges them into one suit with a rocket punch and a booster double-jump, then hides an upgrade that gives the punch range and homing.
- That final Capsule. Four elemental orbs that track you, freeze you, and set you on fire, from a target that mostly ignores your arsenal. Section 9 below is written for this fight.
Strategy Essentials
Everything in this section is the core of the guide: the weakness loops, the parts hunt, the shop, and the finale. Read the two warnings first — they save more runs than any table.
Warning 1 — Some weapons heal or empower bosses. Freeze Cracker restores Freeze Man's health. Thunder Bolt turns Spring Man into a magnet and supercharges Turbo Man. Noise Crush feeds Shade Man. The trap table (§3) lists every case confirmed across damage data.
Warning 2 — This is not the X system. There is no way to extend Mega Man's life gauge, no Sub Tank to find, and no capsule upgrades. If a tip mentions Heart Tanks or armour parts, it is about a different series. Here, survival is bought with E-Tanks (maximum four carried), positioning, and weakness damage.
1. The eight weapons
| Weapon (EN / JP) | From | What it does | Field uses beyond damage |
|---|---|---|---|
| Freeze Cracker / フリーズクラッカー | Freeze Man | Ice shot that splits into shards on hitting a wall; can be aimed up and diagonally | Freezes Cloud Man's weather robot (rain becomes snow, revealing platforms), Junk Man's lava falls, and Burst Man's water spouts |
| Junk Shield / ジャンクシールド | Junk Man | Rotating scrap barrier that erodes as it absorbs hits; Fire again launches what remains | Protection in crowded rooms; shreds the final machine's small skull robots |
| Danger Wrap / デンジャーラップ | Burst Man | Bubble carrying a bomb, floating upward and trapping small enemies; Down + Fire plants it as a mine | Traps and lifts small enemies into bosses |
| Thunder Bolt / サンダーストライク (Thunder Strike) | Cloud Man | Ball of electricity that splits in two on impact | Powers machinery (Junk Man's lift); lights Shade Man's dark section; cleanest tool for the pumpkin mid-boss's core |
| Wild Coil / ワイルドコイル | Spring Man | Spring launched along the ground; charge for a stronger bounce; hold Up while releasing a charged shot to bounce it higher | The charged, high-bounce shot is the anti-Wily Capsule weapon — learn this input before the finale |
| Slash Claw / スラッシュクロー | Slash Man | Short-range, high-power slash | Cuts vines blocking paths; reflects certain projectiles and rocks |
| Noise Crush / ノイズクラッシュ | Shade Man | Sound wave that bounces off walls; if it returns and touches Mega Man, the next shot is charged and much stronger | Bounce it off the wall behind you to pre-charge it for Turbo Man and rematches |
| Scorch Wheel / バーニングホイール (Burning Wheel) | Turbo Man | Wheel of fire rolling along the ground and up walls | Burns the tree hiding Beat in Slash Man's stage; lights torches in Shade Man's dark section |
2. The weakness chain — primary table
Robot Masters have 28 units of health, as does the final Capsule. Rather than print a full damage grid — published damage charts disagree with each other in places because several weapons deal split, multi-hit, or half-unit damage — this table gives what every cross-checked source agrees on: the primary weakness, the confirmed secondary weakness, what you earn, and the traps. Play the order in the right-hand column and each boss hands you the next boss's problem.
First wave (available after the opening stage)
| Order | Boss | Weapon earned | Primary weakness | Also effective | Do NOT use |
|---|---|---|---|---|---|
| 1 | Burst Man | Danger Wrap | Scorch Wheel — not available yet | Freeze Cracker (once owned); the charged Mega Buster is your first-visit answer | Danger Wrap (no effect on him) |
| 2 | Cloud Man | Thunder Bolt | Danger Wrap | Thunder Bolt also connects for reduced effect; the Super Adapter, once built | Junk Shield (no effect) |
| 3 | Junk Man | Junk Shield | Thunder Bolt | Slash Claw (once owned) | Junk Shield (his own weapon, no effect); Scorch Wheel (no effect) |
| 4 | Freeze Man | Freeze Cracker | Junk Shield | Scorch Wheel (once owned) | Freeze Cracker — it heals him |
Second wave (available after the Robot Museum)
| Order | Boss | Weapon earned | Primary weakness | Also effective | Do NOT use |
|---|---|---|---|---|---|
| 5 | Slash Man | Slash Claw | Freeze Cracker | Scorch Wheel (once owned) | Danger Wrap (no effect) |
| 6 | Spring Man | Wild Coil | Slash Claw | The Super Adapter | Thunder Bolt — it magnetises him and pulls you in; Wild Coil (his own weapon, no effect) |
| 7 | Shade Man | Noise Crush | Wild Coil (charged is far stronger; hold Up for the high bounce to reach him in the air) | The Super Adapter's punch is also strong here | Noise Crush — his own weapon feeds his counterattack |
| 8 | Turbo Man | Scorch Wheel | Noise Crush (bounce it off a wall and catch it first for the charged version) | — | Thunder Bolt — it supercharges him and makes him invincible while he charges; Scorch Wheel (his own weapon, no effect) |
Two structural points are built into this table, and both are deliberate:
- Burst Man is the loop's open end. His true primary weakness, Scorch Wheel, belongs to Turbo Man — the last boss of wave 2. On a first visit you fight him with the Mega Buster (he is the most buster-friendly of the eight); the weakness only pays off in the Wily Castle rematch.
- The waves feed each other. Freeze Cracker (wave 1) opens wave 2 by beating Slash Man; Scorch Wheel (wave 2) closes wave 1's loop. That cross-traffic is why the revisit order in §10 matters.
3. Weakness loop diagram, and the trap list
FIRST-WAVE LOOP (buster start)
                                                        Scorch Wheel (Turbo Man, wave 2)
                                                                 │
                                                                 ▼
  [START: Mega Buster] ──► BURST MAN ──Danger Wrap──► CLOUD MAN ──Thunder Bolt──► JUNK MAN ──Junk Shield──► FREEZE MAN
                                                                                                                  │
                                                                                              Freeze Cracker        │
                                                                                                                  ▼
SECOND-WAVE LOOP                                                                                      SLASH MAN ──Slash Claw──► SPRING MAN
                                                                                                                  │
                                                                                              Wild Coil             ▼
  TURBO MAN ──Scorch Wheel──► (feeds Burst Man & Freeze Man above) ◄──Noise Crush── SHADE MAN ◄────────────────────┘
        ▲
        └── Noise Crush is SHADE MAN's weapon:  Shade Man ──Noise Crush──► Turbo Man ──Scorch Wheel──► Burst Man closes the grand loop
Read as one grand loop, the recommended order is:
Burst Man → Cloud Man → Junk Man → Freeze Man → Slash Man → Spring Man → Shade Man → Turbo Man → (Scorch Wheel back to Burst Man in the rematch).
The traps — weapons that help the boss:
| Boss | Weapon to avoid | What happens instead |
|---|---|---|
| Freeze Man | Freeze Cracker | He strikes a pose and recovers health |
| Spring Man | Thunder Bolt | He becomes an electromagnet and drags Mega Man toward him |
| Turbo Man | Thunder Bolt | He supercharges, becomes temporarily invincible, and charges repeatedly |
| Shade Man | Noise Crush | He absorbs it and returns much larger sound waves |
| Burst Man / Junk Man / Slash Man | Their "no effect" weapons (see main table) | Zero damage — pure waste of weapon energy |
| Wily Capsule (final) | Thunder Bolt | No damage — but see §9: used deliberately, it stops his four-orb attack, which is a legitimate defensive trick |
4. Boss notes — one paragraph each
Burst Man. Rising water and ceiling spikes: his bubbles can carry you up into the spikes — that, not the bomb, is the real danger. Stay grounded and charge shots between hops.
Cloud Man. Danger Wrap wraps him up and brings the floating fight down to your level.
Junk Man. Thunder Bolt disrupts his scrap throws; stand in the gap between the junk he hurls rather than chasing dodges.
Freeze Man. Icicles rain, the floor is ice, and his Freeze Cracker can seal you in a block — mash out immediately. Junk Shield trivialises him: walk the shield into him.
Slash Man. He dives, clings, and drops adhesive eggs that glue you to the floor — wiggle free at once. Freeze Cracker freezes him outright, which is why he leads the second wave.
Spring Man. Slash Claw ends his bouncing pattern quickly. Never bring Thunder Bolt into this room.
Shade Man. Partly fought in darkness. He swoops to drain your health (shake free) and petrifies with eye beams. Charged Wild Coil, bounced high, knocks him out of the sky and loops his pattern.
Turbo Man. A Noise Crush duel: bounce yours off the wall behind you, catch it, and return it charged. His Crash Drive charge is the threat; the charged return is the answer.
5. The Super Adapter — R·U·S·H plates and the merged armour
In Mega Man 6, Rush formed two separate armours: Power (strength) and Jet (flight). The Super Adapter is both at once. While wearing it, Mega Man trades his charge shot for a Rocket Buster — a fist that flies a short distance and returns — and gains a Booster Jump, a rocket-assisted double jump. It is selected like a weapon, costs no energy to wear, and is the single most useful exploration tool in the game.
It is not given to you. It is spelled out, one letter per first-wave stage:
| Plate | Stage | Where and how |
|---|---|---|
| R | Burst Man | In the water section, in plain sight. Let the rising water carry you up to it and jump out — the plate you cannot miss is the tutorial for the three you can |
| U | Cloud Man | You need Freeze Cracker first, so this is a revisit item on a strict weakness order. Freeze the weather robot so the rain turns to snow; the snow makes the hidden platforms visible. Further on, use Rush Coil to reach a high ladder, climb, and head left across the platforms |
| S | Junk Man | Also a Freeze Cracker revisit. At the falling-lava section, freeze the lava fall — the ice shatters and opens a way under the platform. Slide through, go down the ladder, freeze the flowing lava on the left, and take the plate |
| H | Freeze Man | At the ladder that can only be reached with Rush Coil, climb up and cross the ice platforms quickly — they crack and collapse if you linger, and they do not return until you leave the stage |
Collect all four and the Super Adapter appears in your inventory automatically. Because U and S both require Freeze Cracker — from the end of the first wave — the Adapter is designed as a reward for finishing the wave and sweeping back through it. Do that sweep before the Robot Museum: high E-Tanks, Beat's rescue route, and the Turbo Man secrets all assume you have it.
The upgrade: Hyper Rocket Buster. The Rocket Buster can be powered up so the fist flies farther, hits harder, and homes. Two routes, and they are alternatives: find it free — in Turbo Man's stage, on the traffic-light platform reached with the Super Adapter (before the second Proto Man meeting, §7), use Rush Search — or buy it for 800 Bolts at Big Eddie after the Hyperbolt (§8), the most expensive item in the game. Find it; the price is the game telling you the search was the intended route.
6. Support items — where everything lives
| Item | Effect | Stage location | Shop alternative |
|---|---|---|---|
| Rush Coil | Rush as a springboard. You start the game with it | — (starting equipment) | Not sold |
| Rush Jet | Rush as a steerable (up/down) flying platform | Junk Man's stage: use Thunder Bolt to power the machinery, ride the rising platform, and jump left to the ladder at the top | Sold after the Hyperbolt (120 Bolts) if you prefer to buy it |
| Rush Search (Search Rush) | Rush digs where he stands; finds supplies, barks near secrets and hidden items | Freeze Man's stage: after the shielded Sniper Joe room, cross the series of platforms to the far side | Sold after the Hyperbolt (120 Bolts) |
| Beat | The bird Beat rescues Mega Man from a pit fall (consumes one Beat call per rescue) | Slash Man's stage: near the end, burn the last tree with Scorch Wheel to reveal a ladder; Rush Coil up, climb, and shoot Beat's cage open | Beat calls are bought at the shop (80 / 40 Bolts); rescuing Beat is what makes them usable |
| Exit | Leave a stage you have already cleared, at any time | Freeze Man's stage: just before the boss shutters, step back and use Rush Search at the edge of the lower platform so Rush lands on the upper one — he digs the Exit up | Sold from the start (200 / 100 Bolts) |
| Energy Balancer | Weapon-energy pickups automatically refill your lowest weapon instead of the one you are holding | Shade Man's stage: take the pumpkin mid-boss's outer-shell route (§7), continue to the portrait of Dr. Wily, and use Rush Search beneath it | Sold after the Hyperbolt (240 Bolts) |
| Proto Shield | Proto Man's shield, carried on your back; deflects many enemy shots while selected | Not in a stage cache and not sold — earned from Proto Man himself (§7) | — |
Carrying limits to plan around: Energy Tanks ×4, Weapon Tanks ×4, Super Tank ×1, extra lives up to 9, Bolts up to 999. When Rush Search digs up a tank you cannot carry, it is wasted — keep a slot open before a digging session in a new stage.
7. Secrets and hidden encounters
The Proto Shield — a three-meeting quest. This is the game's best-hidden reward, and each step is confirmed by every walkthrough that documents it:
- Cloud Man's stage — first meeting. After the green shielded robot, find the ladder hanging from the ceiling before the outdoor section and Rush Coil up to it. Proto Man (Blues in Japan) talks about using weapons to find hidden places. This conversation arms the rest.
- Turbo Man's stage — second meeting. Climb the long ladder past the tire-robot platforms. Just past a grey fixture on the right wall, at the chevron markings, the wall is false — hold Right and jump through it. Proto Man asks about the Super Adapter.
- Shade Man's stage — the duel. At the pumpkin mid-boss (Van Pookin), destroy the inner core — Thunder Bolt is cleanest — not the outer shell. The floor opens: drop down, defeat the lone Sniper Joe, and walk right, through the false wall, to a gate. Beat Proto Man and the Proto Shield is yours: select it like a weapon and it blocks frontal fire — at the cost of your charge shot while equipped.
Both meetings must happen before the duel room will contain him. If the Shade Man room is empty, you missed a meeting — it is almost always the Turbo Man false wall.
The pumpkin's two routes (Shade Man). Kill the inner core and the floor opens to the Proto Man route (plus a hidden Bolt — Rush Search on the steps before the duel). Kill the outer shell instead and a different passage leads to Dr. Wily's portrait, beneath which Rush Search unearths the Energy Balancer. You cannot take both routes in one visit — cleared stages can be revisited freely, and the Exit unit makes the second route painless.
Shade Man's hidden music. On the stage-select screen, hold the B (jump) button while selecting Shade Man's stage until the stage starts. The selection jingle and stage music are replaced by a remix of the main theme from Capcom's Ghosts 'n Goblins / Ghouls 'n Ghosts series — fitting for a castle of coffins and zombies. It only works while Shade Man is still undefeated, so try it on your first visit.
Auto's Hyperbolt (Spring Man's stage). A jack-in-the-box spring in the room of direction-changing boxes can be aimed at a cracked wall in the top-left corner — get up there (the Super Adapter helps), point the box left, and it smashes through to a hidden room holding Auto's lost Hyperbolt. Visiting Big Eddie hands it over automatically: every price is halved and the high-end stock (S-Tank, Rush Jet, Rush Search, Energy Balancer, Hyper Rocket Buster) unlocks. Get it before any major shopping.
Giant Bolts (100 Bolts each). Rush Search unearths a 100-Bolt giant screw at one fixed spot in each of five stages: Shade Man (the steps on the Proto Man route), Turbo Man (after the Rocket Buster platform), Spring Man (the floating platform), Cloud Man (where the 1-Up near the first Proto Man ladder was), and Junk Man (under the first ladder after the falling-junk section). Five digs pay 500 — with the Hyperbolt discount, that is the whole endgame shopping list.
Hidden passwords. Two special passwords are documented for the original cartridge: 1755-8187-6486-2322 opens all eight Robot Master stages from the start, breaking the two-wave lock (reported not to work in the later collections). 1415-5585-7823-6251 — the number shown at the end of the credits — entered normally starts you at the final Wily stage with all weapons and items, four E- and W-Tanks, and 999 Bolts; entered while holding L + R as you press Start, it opens the secret below instead.
Versus Mode. That held-button password opens a two-player fighting mode: Mega Man versus Bass, one arena, buster shots (1 damage, 2 charged), warps, and command special moves. There is no computer opponent — it needs a second player — which is why so many owners never knew it existed. It is also the first time Bass was playable anywhere.
8. Big Eddie's shop — full price list and buying advice
Access: Select on the stage-select screen. Currency: Bolts from enemy drops, stage pickups, Rush Search, and the five giant bolts above. Prices below are cross-checked against the shop's documented stock; the right-hand column is the price after returning Auto's Hyperbolt.
| Item | Normal price | After Hyperbolt | Notes |
|---|---|---|---|
| 1-Up | 40 | 20 | Extra life; carry up to 9 lives total |
| Energy Tank (E-Tank) | 60 | 30 | Full health refill on use; carry up to 4 |
| Weapon Tank (W-Tank) | 100 | 50 | Full refill of one weapon; carry up to 4 |
| Exit | 200 | 100 | Leave a cleared stage freely — or dig one up free in Freeze Man's stage (§6) |
| Beat (call) | 80 | 40 | One pit rescue per call; useless until Beat is rescued in Slash Man's stage |
| Super Tank (S-Tank) | — (locked) | 80 | Refills health and all weapons; carry only 1 |
| Rush Jet | — (locked) | 120 | Convenience if you skipped Junk Man's machinery route |
| Rush Search | — (locked) | 120 | Convenience if you skipped Freeze Man's platforms |
| Energy Balancer | — (locked) | 240 | Convenience if you skipped the Shade Man portrait dig |
| Hyper Rocket Buster | — (locked) | 800 | Convenience if you skipped the Turbo Man dig — the shop's luxury tax |
Buying advice, in order:
- Shop after the Hyperbolt, not before. Halved prices plus unlocked stock means early shopping is twice as expensive for a worse selection. The one exception: an E-Tank before a boss that is beating you is never a mistake.
- Tanks beat parts. Every locked part except the Hyper Rocket Buster can be found free (§6). Bolts are for E-Tanks, W-Tanks, the S-Tank, and Beat calls — in that order.
- Walk into Wily Castle full. Four E-Tanks, four W-Tanks, one S-Tank, and Beat calls to taste. The rematch room drops a large health refill after each boss, so the W-Tanks — for Wild Coil and Thunder Bolt specifically — are what actually run dry.
- Do not farm enemies for bolts. Five Rush Search digs (§7) pay 500. Ten minutes of digging beats an hour of respawn grinding.
9. Wily Castle and the finale
The castle's four stages mix new bosses (a Guts Man tribute in stage 1, Bass in powered-up form, a mask boss in stage 3) with the traditional eight-boss rematch teleporter room in the final stage. The rematch uses exactly the weaknesses in §2, so the grand loop pays off one last time. Then, the two-part finale:
| Boss | Weakness | The fight |
|---|---|---|
| Wily Machine 7 | Thunder Bolt (aim for the cockpit/eye) | A hopping skull machine that sheds small skull robots — Junk Shield cleans those up. Its feet do not hurt you; slide under its jumps rather than retreating into corners |
| Wily Capsule | Charged Wild Coil (hold Up as you release, to bounce it up into him; a charged hit is worth double the uncharged one) | See below — this is the famous one |
Surviving the Capsule. He teleports, appears briefly, and fires four elemental orbs that pause, re-aim at you, and home twice — plus a floor-splitting electric shot. The red orb sets you on fire, the blue orb freezes you solid; both leave you helpless for the next hit, which is how this fight actually kills people. Three habits win it:
- Keep moving in long slides, not hops. The orbs re-aim at your position when they pause; a slide changes your position late enough to spoil the second re-aim.
- Attack only with charged Wild Coil, bounced high. Uncharged coils and buster shots do token damage (only a fully charged buster shot damages him at all, for the minimum). One clean charged coil per appearance is a good trade; greed is punished.
- Use Thunder Bolt as a shield, not a sword. It deals him no damage — but shocking him prevents the four-orb volley entirely for that appearance, leaving only the floor shot. If your Wild Coil energy or your nerve runs out, alternating this trick with E-Tanks is a legitimate, documented way to close the fight out.
Budget honestly: most first-time victories use two or three E-Tanks and the S-Tank in this room. That is what §8's shopping list is for.
10. The completion route — one clean order for everything
- Opening stage → Burst Man (buster; R plate) → Cloud Man (Danger Wrap; take Proto Man meeting #1 here) → Junk Man (Thunder Bolt; Rush Jet via the powered lift) → Freeze Man (Junk Shield; Rush Search, H plate, and the dug-up Exit).
- Revisit sweep: Cloud Man with Freeze Cracker (U) → Junk Man with Freeze Cracker (S) → the Super Adapter is yours.
- Robot Museum (middle stage).
- Slash Man (Freeze Cracker) → Spring Man (Slash Claw; smash the top-left wall for the Hyperbolt, then visit Big Eddie at once) → Shade Man (charged Wild Coil; visit 1: core route and — if both Proto Man meetings are done — the duel and giant bolt; visit 2: shell route, Energy Balancer) → Turbo Man (charged Noise Crush; Super Adapter to the traffic-light platform and Rush Search for the Hyper Rocket Buster; take the false wall for Proto Man meeting #2 before attempting the Shade Man duel).
- With Scorch Wheel owned, revisit Slash Man's stage end: burn the tree, rescue Beat.
- Shop at Hyperbolt prices: fill to 4 E-Tanks, 4 W-Tanks, 1 S-Tank, Beat calls to taste.
- Wily Castle 1–4 → rematch on the §2 table → Machine on Thunder Bolt → Capsule on charged Wild Coil, Thunder Bolt as the emergency brake.
Follow that, and no stage needs more than two visits — and the second visits are the short ones.
Who It's For
- Classic-series completists who skipped the one 16-bit entry — this is the most guide-rewarding game in the numbered classic line.
- Boss-rush players who enjoy learning patterns and executing a chain: eight bosses, two interlocking loops, and a final Capsule that still tests veterans.
- Explorers over speedrunners. The joy here is the second layer — plates, digs, false walls, and forks. Running only the boss order is playing half the cartridge.
- Newer players, with a caveat. The shop and tank economy make 7 more forgiving than the NES games mid-run — but the opening is slower-paced than X, and the final boss makes no concessions at all.
How to Play It Today
- Mega Man Legacy Collection 2 (PlayStation 4, Xbox One, Nintendo Switch, PC) is the straightforward modern route, alongside 8, 9, and 10. Note that at least one special password in §7 is reported not to carry over to the collections — test the Versus Mode route on your version before promising a friend a match.
- Mega Man Anniversary Collection (PlayStation 2, GameCube, Xbox) includes it for owners of that era's hardware.
- Virtual Console releases appeared for Wii U and New Nintendo 3DS in Japan (2014 and 2016 respectively); storefront availability changes over time, so check the current shop for your region.
- Original Super Famicom / SNES cartridge remains the reference version for this guide — 16 Mbit, password saves, every trick in §7 as documented. Japanese cartridges are the affordable end of the market; the game is fully playable without reading Japanese, and §1's bilingual weapon table covers the names that matter.
Find the original Japanese cartridge
Disclosure: The Rakuten and Yahoo! Shopping links are standard shopping links. Enkeisha does not earn a commission from purchases made through these links.
Find original hardware editions on eBay
As an eBay Partner Network affiliate, Enkeisha may earn a commission from qualifying purchases made through these links.
Search eBay listings (affiliate link)
Check the language, region, hardware compatibility, condition and authenticity before buying. Search results may include reproductions; links do not endorse individual sellers.