Contra Spirits (Contra III) — Two Guns, Six Stages, No Room to Blink: The Complete Weapons, Boss and Difficulty Guide
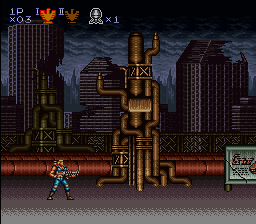
Most run-and-gun games give you one gun and ask you to survive. Contra Spirits (Konami, 1992) — Contra III: The Alien Wars overseas — gives you two, lets you swap between them mid-jump, mid-boss, even mid-pause, and then designs every stage around the assumption that you are managing an arsenal, not just holding one: four side-view stages of escalating set-pieces, two Mode 7 top-view stages that rotate the whole battlefield around you, a boss gauntlet in the final stage that re-fights the final bosses of the earlier games, and a true final form that the Japanese version already unlocks on Normal. This guide covers all six stages and their viewpoints, the full weapon line-up and the two-slot system that governs it, every stage boss and the Stage 6 gauntlet, and exactly what Easy, Normal and Hard change — including where the Japanese cartridge differs from the overseas ones.
A note on names and versions: This article describes the original Japanese Super Famicom cartridge, Contra Spirits. In North America the game is Contra III: The Alien Wars and its heroes were renamed Jimbo and Sully (Bill Rizer and Lance Bean in Japan); in Europe it is Super Probotector: Alien Rebels, where the heroes — and only the heroes — were replaced by robots (RD008 and RC011), with enemies, bosses and stages otherwise the same. Version differences that affect play — continues, hidden codes, and which difficulties reach the true final boss — are listed separately in Strategy Essentials §5 rather than blended into the main text.
Quick Facts
| Item | Detail |
|---|---|
| Japanese title | 魂斗羅スピリッツ (Contra Spirits) |
| English title | Contra III: The Alien Wars (Europe: Super Probotector: Alien Rebels) |
| Platform | Super Famicom / Super NES |
| Release date (Japan) | February 28, 1992 (North America: April 1992; Europe: 1992, as Super Probotector) |
| Developer / Publisher | Konami |
| Genre | Run-and-gun action (side-view + Mode 7 top-view stages) |
| Players | 1–2 (simultaneous; top-view stages use split-screen in 2-Player A mode) |
| Cartridge | 8 Mbit, LoROM, ROM-only (no battery save); internal title "CONTRA SPIRITS", Japanese version 0 |
| Setting | The year 2636: Red Falcon's alien forces have overrun Neo City |
| Series position | Third main Contra after Contra (1988) and Super Contra (1988); followed on the same hardware generation by Contra: Hard Corps (Mega Drive, 1994) |
Overview
The structure is six stages and no filler, but the six are deliberately unlike each other. Stages 1, 3 and 6 are conventional side-view advances — city street, factory, alien hive. Stage 4 is a forced-pace vehicle stage built from a jet-bike ride, a helicopter climb and a sequence of riding homing missiles across the sky. Stages 2 and 5 abandon the side view entirely: they are top-view arenas rendered with the Super Famicom's Mode 7 rotation, in which you choose one of 16 drop points, then hunt a set of fixed targets scattered across the map — radar arrows and a Select-button map point you to the nearest one — before the stage boss appears.
Three systems tie the whole game together. First, the two-weapon inventory: you carry two weapons, swap with the X button at any time, and death costs you only the weapon in your hands — the stored one survives. Second, the Bomb (the M-80,000 Helio Bomb in the US manual): a stock-limited screen-clearing weapon you begin every life with exactly one of. Third, the difficulty contract: Easy, Normal and Hard do not merely tune numbers — they change how fast everything flies at you, how aggressively bosses attack, and, at the end of Stage 6, whether the alien brain stays dead. In the Japanese version the true final form already appears on Normal; overseas, it is Hard-only (see §5).
Co-operative play is simultaneous throughout, with one structural caveat: the top-view stages in 2-Player A mode split the screen horizontally, each player rotating their own view; a second 2-Player B mode shares one view. Everything in the strategy sections below is written for the single-player game and holds in co-op unless noted.
Why It Still Matters
Contra Spirits is the series' 16-bit statement of intent, and its most quoted trick is generosity as difficulty design: two weapons, a bomb in your pocket at every respawn, unlimited continues in the Japanese version — and a game that is still famously hard, because everything that generosity buys you is immediately spent on denser stages. The top-view stages are the other lasting idea. Rotating an entire battlefield around a fixed, upward-facing soldier was a Mode 7 showcase in 1992, but it is also a genuinely different skill — orientation management instead of aim management — and the series never repeated it in this form: the Game Boy Advance port later replaced both top-view stages with levels borrowed from Hard Corps.
It is also a game whose regional versions genuinely diverge, which is why this guide keeps them separated. The Japanese cartridge hides three codes (30 lives, stage select, sound test) that were removed overseas, never limits your continues, and shows its full ending — staff roll included — on far more difficulties than the overseas versions do. Playing "Contra III" in translation and playing Contra Spirits are close, but not identical, experiences.
Highlights
- The two-gun system, used properly. A boss weapon and a crowd weapon, swapped freely — §2 is built around pairings, because the game is. The famous answer, two Crush Guns, is available as early as Stage 1 if you collect carefully.
- A stage list with no repeats. Street, rotating highway, factory climb, missile-riding sky battle, rotating cliff, and a hive that re-stages the series' own history as a boss gauntlet (§4).
- The spin jump. Jumping while spinning fires both weapons in a circle — the only omnidirectional attack you own, and a trap: take a hit mid-spin and you lose both weapons, not one.
- An ending gated by nerve, not by collectables. No keys, no item hunt: the true final form and the full ending are bought purely with the difficulty you clear (§5).
Strategy Essentials
1. The six stages: viewpoints, objectives, and what each one demands
The single most useful fact in this guide is in the second column: Stages 2 and 5 are the top-view stages. Everything else — controls, objectives, boss logic — follows from the viewpoint.
| # | Stage (EN name) | View | Objective shape | Signature set-pieces |
|---|---|---|---|---|
| 1 | Occupied City Street | Side-view | Advance right to the boss | Collapsing street, wall turrets, a rideable tank, a grenade-tank miniboss |
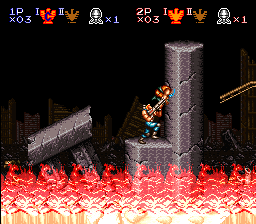
| 2 | Destroyed Highway | Top-view (Mode 7) | Choose 1 of 16 drop points; destroy all fixed targets, then the boss | Rotating battlefield; Twylobite nests hoarding power-ups; bridges over the highway maze |
| 3 | Factory Zone | Side-view | Advance and climb to the boss | Ceiling-climbing sections, the three-form Wall Walker, a collapsing scaffold finale |
| 4 | Air Battle | Side-view, forced pace | Vehicle gauntlet to the boss | Jet-bike ride, helicopter ascent, riding homing missiles between ships |
| 5 | Sheer Cliff | Top-view (Mode 7) | Choose 1 of 16 drop points; destroy all fixed targets, then the boss | Rotating cliffs; the hardest target hunt in the game |
| 6 | Alien's Main Base | Side-view + vertical climb | Boss gauntlet, then the final bosses | Re-fights of earlier games' final bosses; the roulette brain; the helicopter escape |
VIEWPOINT MAP
Side-view   :  1 ───── 3 ───── 4 ───── 6      (advance; boss at the end)
Top-view    :        2 ───── 5                (drop-point choice; target hunt; boss last)
Finale      :  Stage 6 = gauntlet (Java → Heart → Kimkoh → Metal Alien)
               → Brain → [true final form: JP Normal/Hard, overseas Hard] → escape
How the top-view stages actually play. Your soldier always faces the same way relative to the screen; you rotate the world with the L and R buttons, steer with the control pad, and fire with Y — each weapon slot is assigned to an arm, and X switches which hand fires. Hold L and R together while tapping Y and you spin-fire in all directions. Because orientation, not aim, is the skill, the standing advice is: pick a drop point near a target cluster, clear targets in a rough circuit instead of crossing the map repeatedly, and check the Select-button map before every long trek. In 1-player mode the world rotates around you; in 2-Player A mode each half of the split screen rotates independently.
2. Weapons: the full line-up, the two-slot rules, and pairings that work
Weapons arrive from flying Weapon Wing carriers — shoot one down, collect the falcon emblem, and the weapon it carried replaces the slot you are currently holding. That last clause is the whole management game: switch to the slot you are willing to lose before you pick up a new weapon.
| Code | Weapon | Behaviour | Strengths | Limits / cost of use |
|---|---|---|---|---|
| — (default) | Rifle | Standard rapid-fire gun; hold Y for continuous fire; the weapon you respawn with | Reliable in all eight directions; never a bad fallback | Lowest damage of the set; long boss fights expose it |
| S | Spread Gun | Fires a five-way fan of shots | Crowd control, target hunts, the Stage 6 heart's spawn swarms; point-blank fans are heavy | Damage per pellet was deliberately toned down from earlier games — it wins by coverage, not by single-target damage |
| C | Crush Gun | Missiles that explode on contact (or at maximum range); the blast keeps damaging whatever it touches | Highest effective boss damage in the game; the explosion lingers, so near-misses still pay | Slow rate of fire; the blast can hide enemy bullets behind its own flash |
| L | Laser Gun | A long, piercing beam; in top-view stages it becomes a continuous stream | Heavy, precise damage through lines of enemies; excellent on fixed cores | Slow cycle between shots; unforgiving if your aim line is wrong |
| H | Homing Gun | Launches missiles that steer themselves into nearby targets (one missile per shot in this game) | Zero aim burden — the top-view stages' best friend, and the safe choice while learning a boss | Weakest damage output; bosses take a long time |
| F | Fire Gun | A flamethrower: hold Y and a continuous gout of flame projects from the gun | Enormous damage at point-blank; melts grounded targets that must come to you | Shortest range in the game; useless against anything that keeps its distance |
| Item | Barrier | Not a gun: a pickup granting temporary invincibility | Buys safe passage through the densest bullet patterns | Timed — treat it as a bridge across one bad section, not a boss strategy |
| Item | Bomb (M-80,000 Helio Bomb) | Stock weapon on the A button: damages or destroys everything on screen | The panic button; also the correct answer to several miniboss add-waves | Stock-limited — see the bomb economy below |
The two-slot rules, stated once and completely:
- You hold exactly two weapons; X swaps them, and you can swap at any time — including while paused.
- Death costs the weapon in your hands. The stored weapon is kept. Corollary: before a dangerous section, swap so that the weapon you can afford to lose is the one equipped.
- The spin-jump exception: the spinning jump fires both weapons at once, but being hit during it costs you both. Use it to clear a surround, never as a default jump.
- A shoulder-button aim lock lets you plant your feet and fire in all eight directions without moving — the correct posture for most boss cores.
- Pickups overwrite the equipped slot (see above). The classic accident — collecting a Homing Gun over a Crush Gun in front of a boss door — is a slot-discipline failure, not bad luck.
Pairings that work, by job:
| Pairing | Job it solves | Where it earns its place |
|---|---|---|
| C + C | Maximum boss damage; both slots insurance against one death | Available from Stage 1 if you collect two Crush Guns; the default answer to Stages 3 and 6 |
| C + L | Boss damage with a precision option | Stage 1's turtle and Stage 4's battleship, where the core is small and fixed |
| C + S | Boss damage plus crowd cover | Stage 6, where the heart's spawned swarms punish a pure boss build |
| H + C | Hands-free clearing while you learn patterns | Both top-view stages; swap to C for the boss |
| F + C | Point-blank melting plus a ranged option | Grounded bosses that close on you (Stage 3's robot); never take F alone into Stage 4 |
The bomb economy. You begin every life with exactly one Bomb; pickups add to the stock, and dying resets the stock to one — bombs do not accumulate across deaths. Spend them on miniboss add-waves and surrounded moments, not on stage bosses you are already damaging safely: a bomb held through a death is a bomb deleted.
3. Bosses: every stage boss, and the Stage 6 gauntlet
Boss names below follow the names used in Japanese materials and the long-running reference literature; descriptive aliases from the FAQ tradition ("Turtle Boss", "Spider Boss") name the same fights and are given alongside.
| Stage | Boss | Pattern | Counter-play |
|---|---|---|---|
| 1 | Slave Beast Taka ("Turtle Boss") — a giant alien tortoise | Advances along the street breathing flame; its weak point is the exposed core low on its body | It can only be hurt in the core. Stay grounded, fire up into the core at point-blank with C or L, and treat the flame breath as a spacing timer, not a threat to trade with |
| 2 | Bosco Spider ("Spider Boss") — giant spider | Crawls the arena, charges and spawns lesser aliens; fought in top view after the target hunt | Keep rotating so it stays in your firing line; H earns its keep here because your attention belongs on orientation. Clear its spawns before they fence you in |
| 3 | Big Fuzz — the giant robot | After two smaller brother robots (one grounded shooter, one wall-clinging jumper), the big robot emerges and attacks with crushing advances | Kill the grounded brother first — fighting both patterns at once is the real boss. Against Big Fuzz itself, C+C and patience: its openings are regular, its contact damage is the punishment for greed |
| 4 | Anti-Contra Battleship Dodriguez ("Alien Ship") — a flying battleship | The ship itself is the boss: shielded core, shield generators, missile and cannon fire while you ride missiles between platforms | Destroy the shield generators first — the red core cannot be finished behind its shield. The fight is won or lost on the missile rides: dismount early rather than riding into fire |
| 5 | Anthell ("Eye Worm Boss") — a giant eyed worm | Erupts from the cliffs in top view, burrowing and resurfacing; the eye is the target | The hardest top-view boss: track the burrow's direction, rotate early, and fire in the resurfacing moment. H again lowers the aim burden while you manage rotation |
| 6 | The Brain (roulette boss), then the true final form | See the gauntlet table below | See below |
Stage 6 is a gauntlet, not a stage with a boss. In order:
| Order | Fight | Note |
|---|---|---|
| Miniboss | Demon Dragon God Java — the hanging dragon | The Super Contra lineage's dragon, re-staged |
| Miniboss | Gomeramos King — the Alien Heart | The original Contra's final boss, returned: destroy the sacs, then the heart itself; on Hard its spawned aliens arrive at a punishing rate — this is what you saved Spread or a Bomb for |
| Miniboss | Shadow Beast Kimkoh ("Golden Beast") | Charges and leaps from the ground; punish the landing, never meet the charge |
| Miniboss | Metal Alien ("Vicious Slave Hawk") | A flying charger in the Wall Walker's mould; dodge the bumping runs, fire in the recovery |
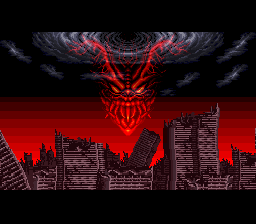
| Final boss | The Brain — a living brain organism that attacks through a rotating "roulette" of orbs and forms | Watch the rotation slow and commit to the attack the roulette offers; several of its forms are far cheaper to fight than others — this is a patience check with a damage check behind it |
| True final form | Six Men Feromedos — the brain, armoured in six human faces | Difficulty-gated — see §5. Fought hanging from the escape helicopter: keep firing upward, do not press down (you will let go and fall), and spend every remaining Bomb |
One naming caution: Japanese reference materials catalogue the Stage 6 brain under more than one formal name (the brain organism and its imperial title are assigned differently between sources), so this guide calls it "the Brain" throughout rather than print one assignment as certain. The descriptive tradition — "Roulette Brain" — is the same fight.
4. Stage-by-stage field notes
- Stage 1 teaches the economy: two Crush Guns are obtainable here, and arriving at Taka with C+C and spare Bombs converts the game's first wall into a formality. Do not despise the tank section — the tank's cannon is the safest damage in the stage.
- Stage 2 is lost in the map screen, not in combat: choose the drop point that starts your circuit, and remember Twylobite nests are where the power-ups are hoarded — the target hunt and the shopping trip are the same route.
- Stage 3's three-form Wall Walker (a flying pod miniboss on the climb) is the stage's real exam: each form changes the safe ground. Save your precision weapon for it, not for the corridor before.
- Stage 4 is the difficulty spike everyone remembers: the battleship fight at the end combines the shield-generator sequence with the missile-riding that got you there. Practise dismounting early on the way in; the boss gives you no safe place to learn it.
- Stage 5 is Stage 2 with the training wheels off — the target hunt is longer, the cliffs break your sightlines, and Anthell punishes slow rotation. If a top-view stage is going to end a run, it is this one.
- Stage 6 should be entered with C+S or C+C and a deliberate Bomb count: the gauntlet's fights are individually easier than Stages 4–5's bosses, but there are six of them and no refill between.
5. Difficulty and versions: what actually changes
| Factor | EASY | NORMAL | HARD |
|---|---|---|---|
| Enemy & projectile speed | Slowest — shots, beams and flames all travel slowly | Faster across the board | Fastest; enemies also respawn more quickly |
| Enemy & boss aggression | Most enemies cross the screen firing little; bosses are at their softest | Bosses fire more often; some gain extra attacks | Bosses at their toughest, with extra attacks; the Stage 6 heart's spawn rate becomes a fight of its own |
| True final form (Six Men Feromedos) — Japanese version | Does not appear | Appears | Appears |
| True final form — overseas versions | Does not appear | Does not appear | Appears (Hard only) |
| Full ending / staff roll — Japanese version | Shown, staff roll included | Shown in full | Shown in full, with the most complete final scene |
| Full ending — overseas versions | No staff roll | A message only — no full ending sequence | The full ending |
Version differences beyond difficulty (Japanese cartridge vs. overseas, stated as facts of the releases, not as recommendations):
| Item | Japan (Contra Spirits) | North America / Europe |
|---|---|---|
| Continues | Unlimited | Limited (4; only 2 on Easy) |
| Hidden codes | Three codes present — 30 lives, stage select, sound test | All three removed |
| Heroes | Bill Rizer and Lance Bean | Renamed Jimbo and Sully (NA); replaced by robots RD008 / RC011 (EU, Super Probotector) — gameplay cast otherwise identical |
| Final crowd scene | The crowd in the last scene grows with the difficulty cleared | Differs in text and presentation |
A note on what this section does not claim: published sources agree on the speed, aggression, continues and ending gates above, but per-enemy hit-point values by difficulty are not consistently documented across sources, so this guide prints none rather than present one FAQ's table as the cartridge's truth. Plan around patterns and gates, which are stable, not around HP counts, which are not.
Who It's For
Run-and-gun players who want the genre's 16-bit benchmark at full strength — and co-op pairs especially, since simultaneous two-player is where the two-gun system and the split-screen top-view stages become a shared logistics problem. Series historians will want the Japanese cartridge specifically: the unlimited continues, the three hidden codes and the Normal-difficulty true final form make it the most complete version of the game as released. It is not a gentle introduction to the genre — Stage 4 and Stage 5 end beginner runs regardless of difficulty — and players who dislike rotating-viewpoint stages should know in advance that two of the six stages are exactly that, and neither is skippable.
How to Play It Today
The reference version for this guide is the original Super Famicom cartridge. The Japanese cartridge is common and is the version whose continues, codes and difficulty gates are described above. The most accessible modern route is the Contra Anniversary Collection (2019; Switch / PlayStation 4 / Xbox One / PC), which includes the Japanese, North American and European versions side by side — the cleanest way to verify every regional claim in §5 yourself. The game also had Virtual Console releases in Japan (Wii; and a New Nintendo 3DS release, whose official online manual Nintendo still hosts) — those storefronts have closed, so treat surviving listings as history rather than purchase routes, and check any current subscription catalogue before assuming the game is or is not included, as catalogues change.
Find the original Japanese cartridge
Disclosure: The Rakuten and Yahoo! Shopping links are standard shopping links. Enkeisha does not earn a commission from purchases made through these links.
Find original hardware editions on eBay
As an eBay Partner Network affiliate, Enkeisha may earn a commission from qualifying purchases made through these links.
Search eBay listings (affiliate link)
Check the language, region, hardware compatibility, condition and authenticity before buying. Search results may include reproductions; links do not endorse individual sellers.